
Farmer Dan’s Vacation Prep
The week leading up to any vacation from the farm is an extra busy one. Not only do we have the usual harvesting, washing, packing, transplanting, weeding, crop care but I’m also anticipating everything that could get done a week early and trying to get that done too. It’s a lot and I thought it’d be interesting to go over my preparation steps in this weeks blog post.
A side note: my vacation to the boundary waters wilderness was excellent. Beautiful scenery, good weather, good company (the fishing was bad though!). Anyway, onto the vacation prep:
Weeds. This is the big one. A week is a long time for a weed to grow so I did everything I could to kill the weeds before I left. This meant a cultivation pass of the entire farm on Friday, flame weeding newly planted but not yet emerged carrots & beets, and tilling extremely weedy areas and harvested crop areas. The results were great: I’ve never left the farm looking so clean. We do have weeds but it wasn’t too bad.
Planting. As luck would have it there was only one item on my planting schedule to be planted last week. I decided to delay it a week.
Staff Notes & Notes for Lara. I chuckled at myself as I ended up typing up four pages of notes for Lara and my staff. These notes are the things inside my head that I just do every week. Monitoring the weather, monitoring the tunnels, payroll & HR things, crops that are coming into season, transplant list and where to transplant & so much more.
Emails. I had several emails that I wrote in advance and scheduled to send while I was away.
Now that I’m back I am so glad I worked extra hard to stay ahead of the weeds. We got around 3-4” of rain while I was gone and the weather and ground was not fit for weeding at all last week. Lara and my staff did great keeping things humming along last week and we didn’t have any major problems.

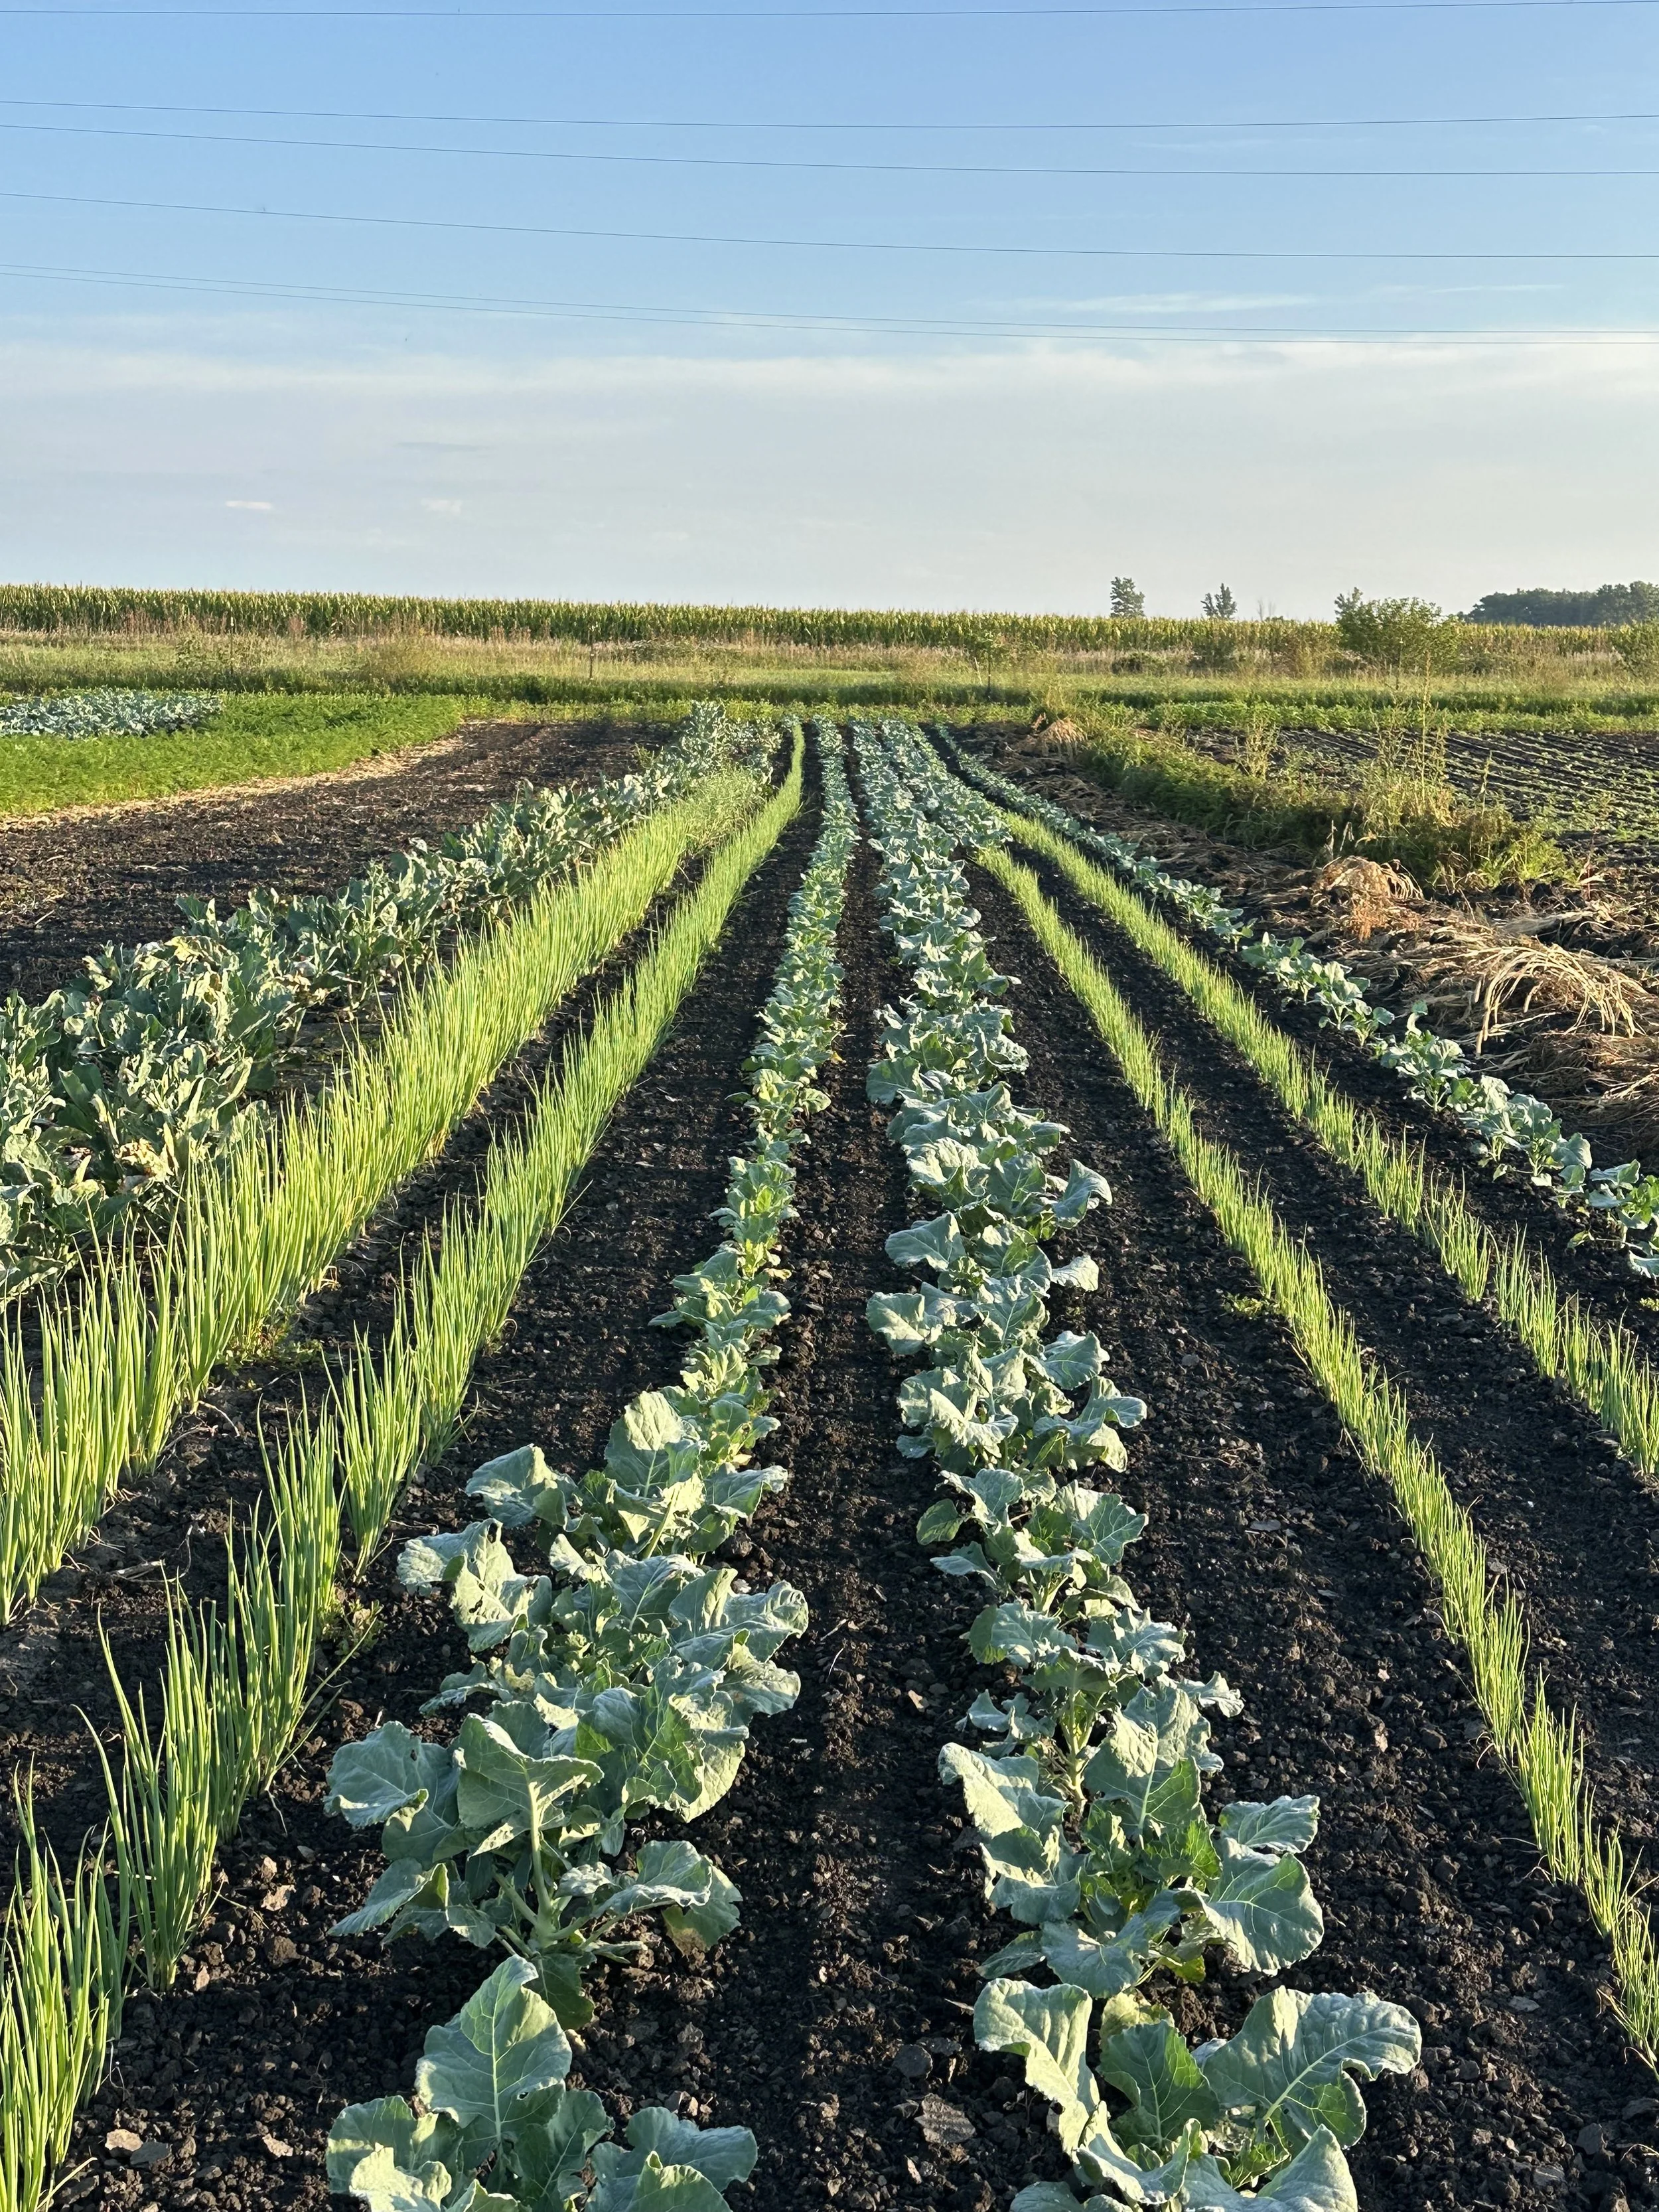
The farm before I left on vacation.
Preparing The Winter Tunnel
It was an exciting day on the farm yesterday as we began preparing the beds inside our new winter tunnel for its first crops. These initial steps are critical to ensuring we get reliable harvests year after year. Today’s blog post will go over some of the preparation steps we’ve taken and some of the supplies and tools we need to complete the tunnel.
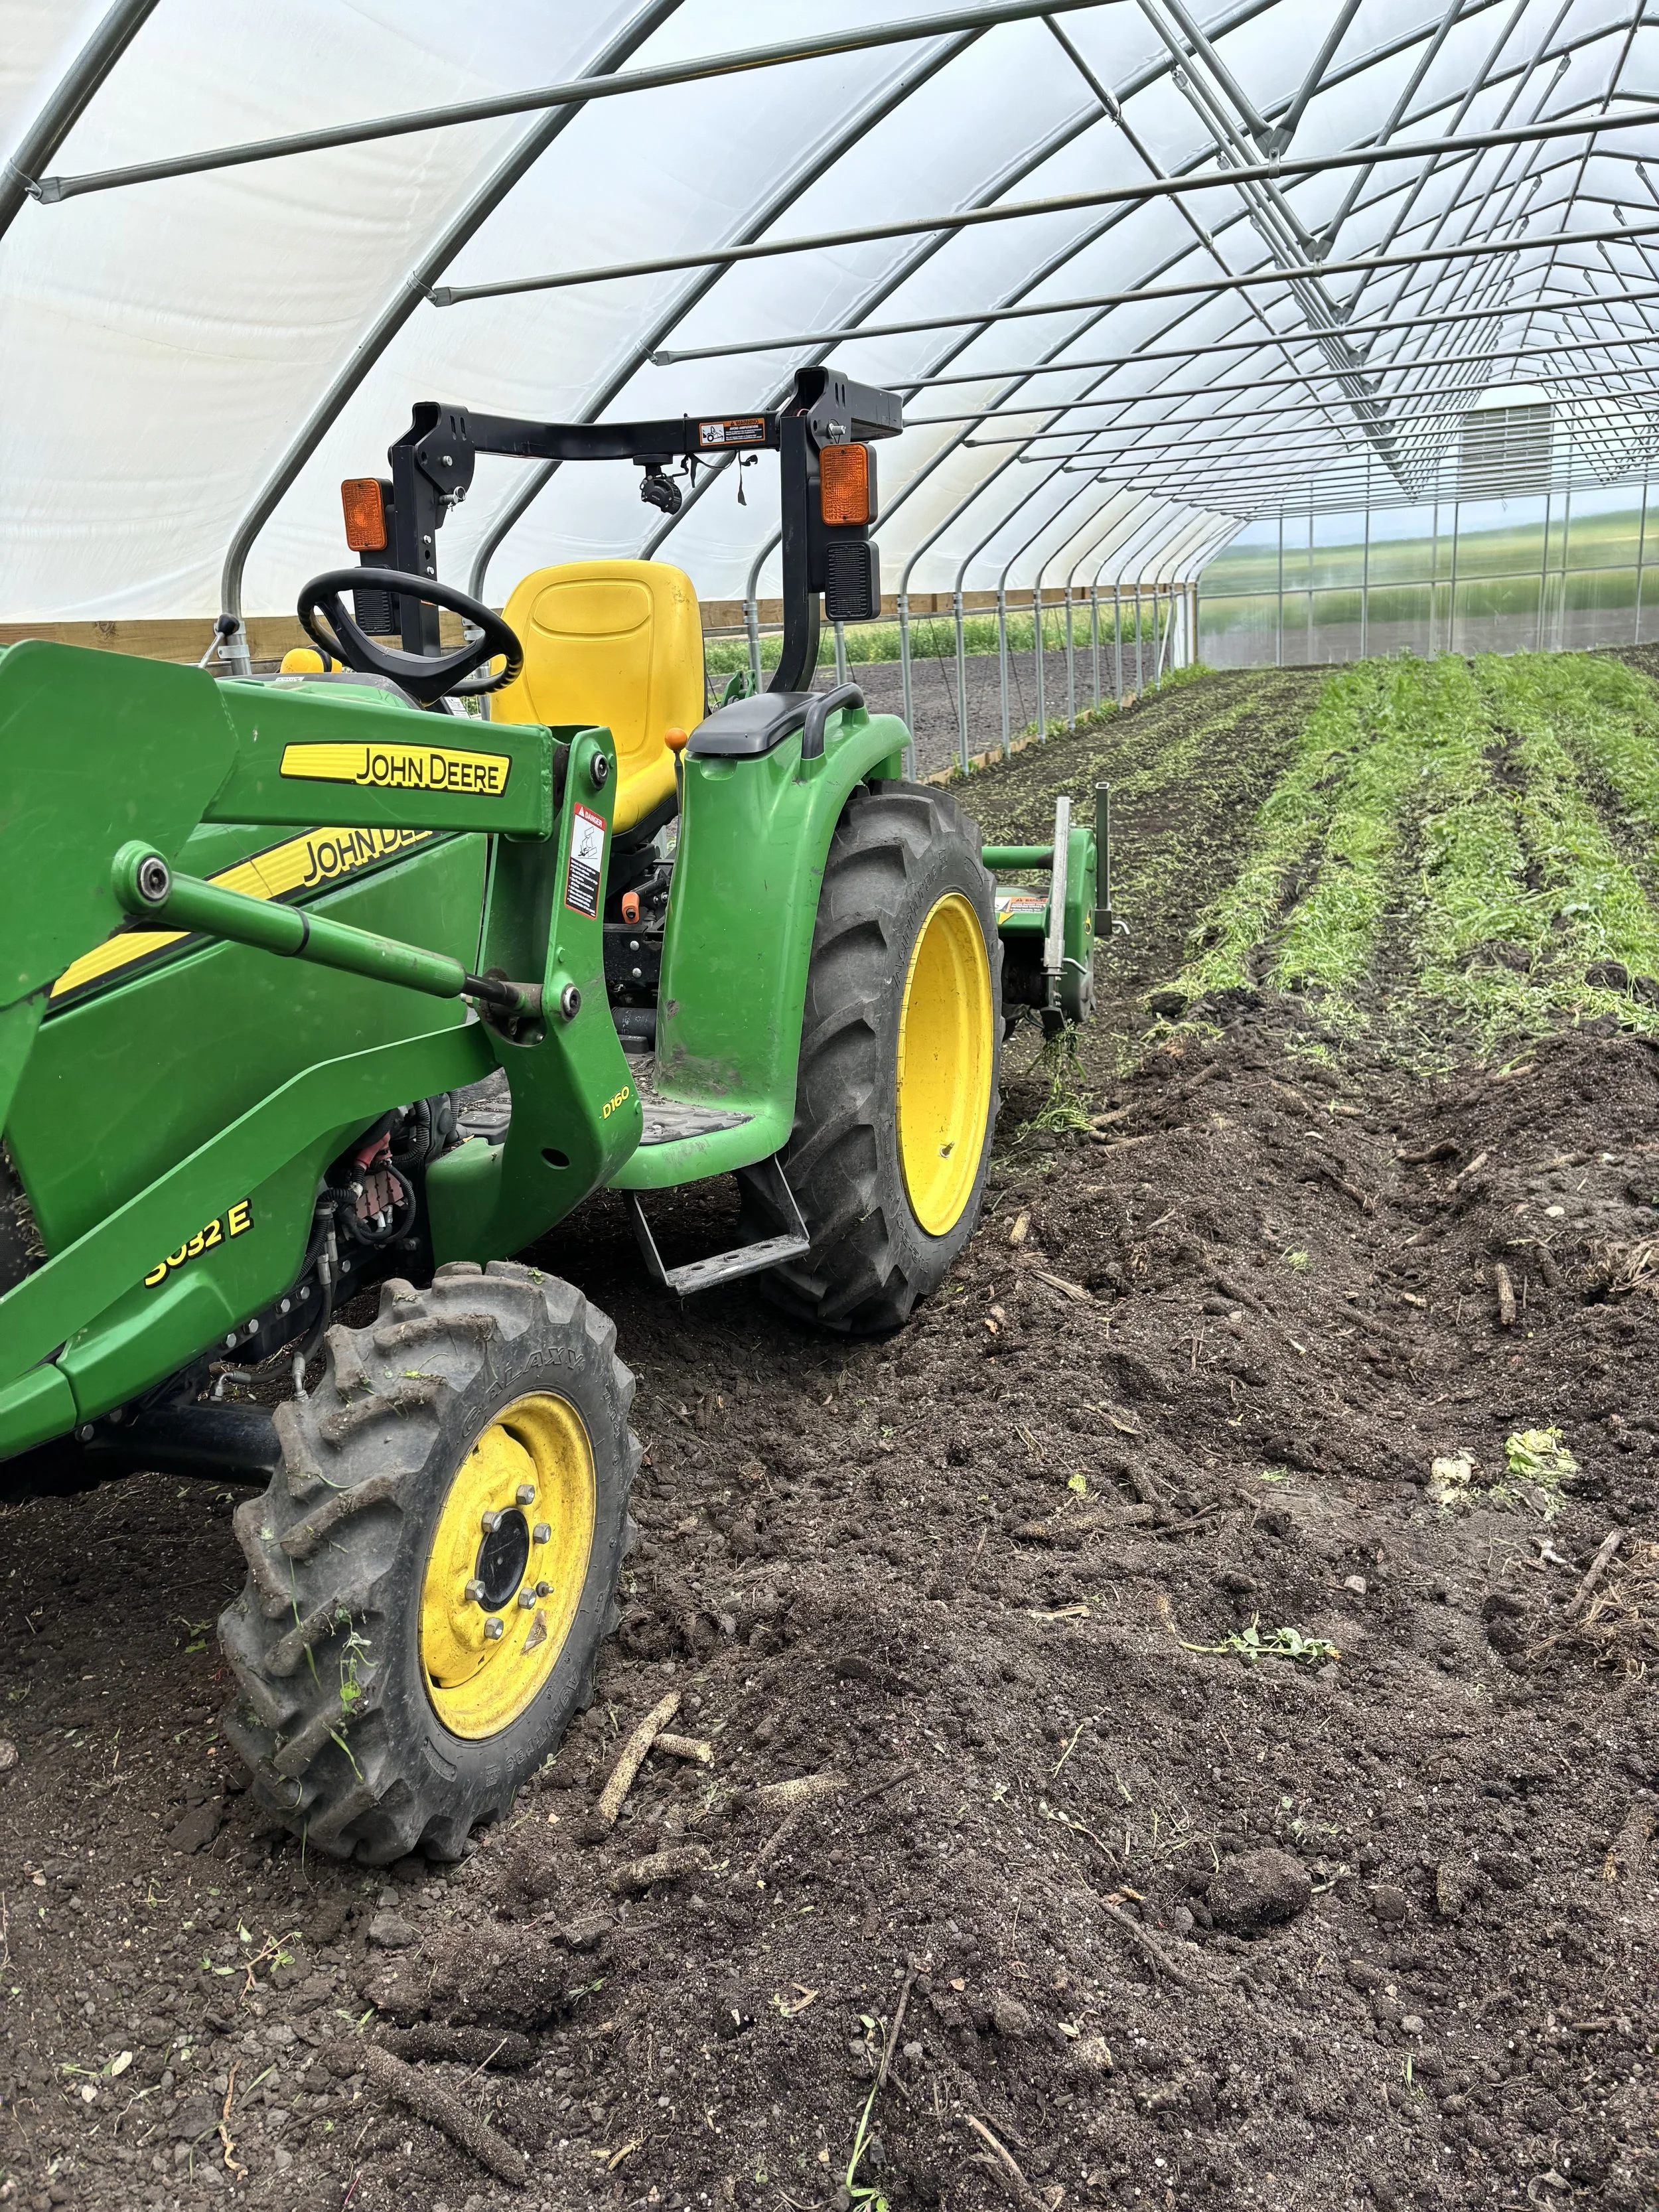
Preparing the beds within the tunnel for crops is the most important step and there were several factors contributing to how we approached this initial setup. First, we knew on one end of the tunnel that the soil was extremely compacted from tractor and gator traffic before the tunnel was constructed. We used a subsoiler and applied a very generous layer of compost on top to both break up compaction and add in some very high organic matter that will help loosen compaction over time.
Our spring cover crop didn’t come in as well as we would have liked and we had a lot of weeds poking through. We decided to use our roto-tiller to terminate the weeds and cover crop. Then we followed that with a bed shaper to make raised beds within the tunnel. We’ll leave the weeds lay for a a few days and then we may either till and reshape the beds or flameweed depending on our observations.
Once the beds are prepped we need some tunnel infrastructure to keep things alive. Of the highest importance is water: it doesn’t rain inside the tunnels! We will have both overhead and drip irrigation in our new tunnel. Depending on the time of year and crop that’s grown we use different irrigation techniques for the best plant health. We’ll also need power to our tunnel. Not only does it have a blower for the 2 layers of plastic but it has automatic, thermostatically controlled louvers and will have a thermostat, heater and blower for winter crops. We’re securing quotes for electrical connections in the tunnel so if you’re an electrician let us know!
Garlic Scapes: A Hidden Treasure of Market Farms
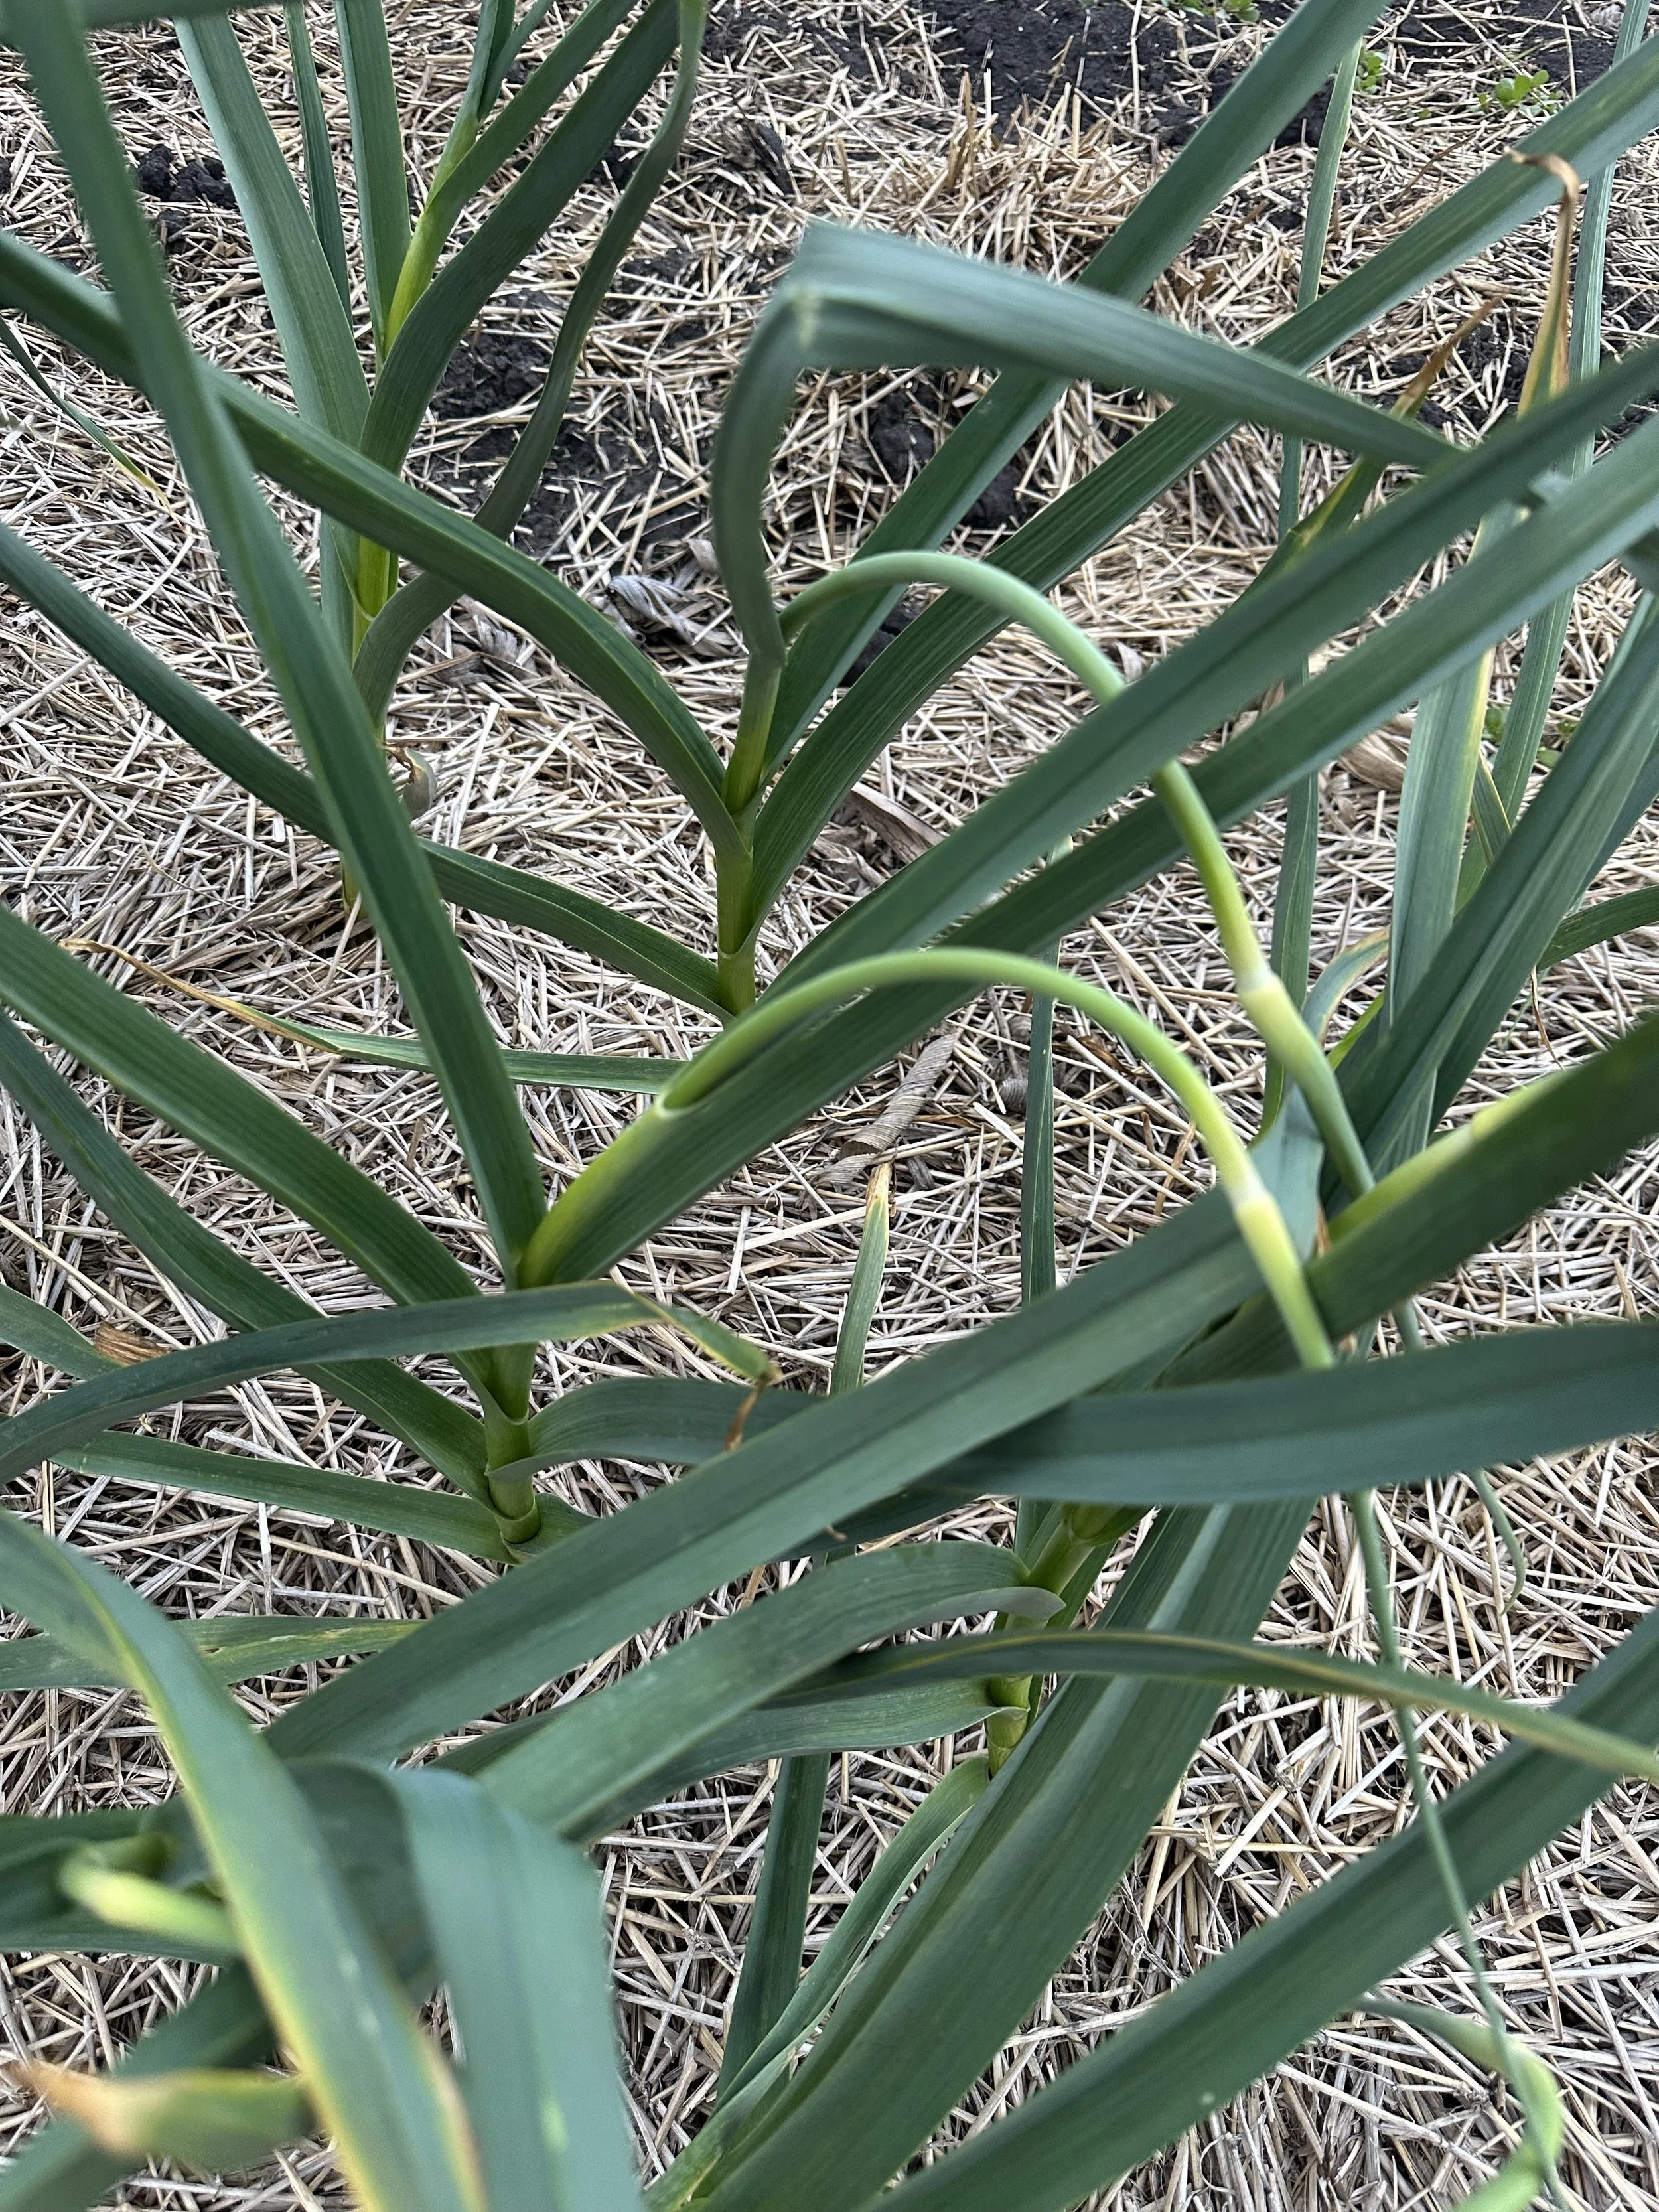
What is a garlic scape? A garlic scape is the flower stem of the garlic plant. They typically are in season in the second half of June and only for a couple weeks. Each garlic plant only produces one scape so the supply is limited, the shelf life is short (compared to garlic), and since they’re bunched you need several plants worth of scapes to make a bunch.
The flavor profile of garlic scapes is mild to medium garlic flavor raw and very mild to nearly sweet when cooked or grilled. They have a cooked texture similar to asparagus though they are quite different in flavor.
Two of our favorite things to do with garlic scapes here at the Zimmerli household are to toss them in olive oil grill them until they’re slightly tender 3-5 minutes. We serve these as a vegetable side dish. Another favorite is garlic scape pesto. This is great as a pizza base or in pastas amongst many other uses. Below are the ingredients & instructions.
Look for garlic scapes on our farm store, in CSA shares and on our market stand in the next few weeks and stock up while you can!
Ingredients
2 bunches garlic scapes
1/2 cup basil leaves
1/4 cup sunflower seeds
1/2 cup olive oil
1/4 cup Parmesan
1 lemon, juiced
Instructions
Roughly chop scapes and then pulse in food processor for 30 seconds.
Add sunflower seeds and pulse for additional 30 seconds. Scrape down sides of bowl.
Add olive oil and process on high for 15 seconds.
Add Parmesan cheese and pulse until combined.
Add basil and lemon juice and process to desired consistency.
Salt to taste.
Why Cover Crops Are Important: 2026 Revision
Farming in a sustainable and earth friendly manner is one of our primary farming values on our farm. We seek to not only maintain but improve the land we farm on over time. In the grand scheme of things, the time we spend farming this land is pretty small and we want the next generation of farmers to be able to succeed. Not only that but we also want to protect the soil, air and water so that our farming footprint stays confined to the acres we farm. One of the key ways we work towards this goal is by planting cover crops. Today we’ll go over why cover crops are important and what cover crops we plant on our farm.
First, we should define what a cover crop is. For us, a cover crop is a crop that we plant whose primary purpose is to improve our land. Further, a cover crop is not planted with intent to harvest and sell a product.
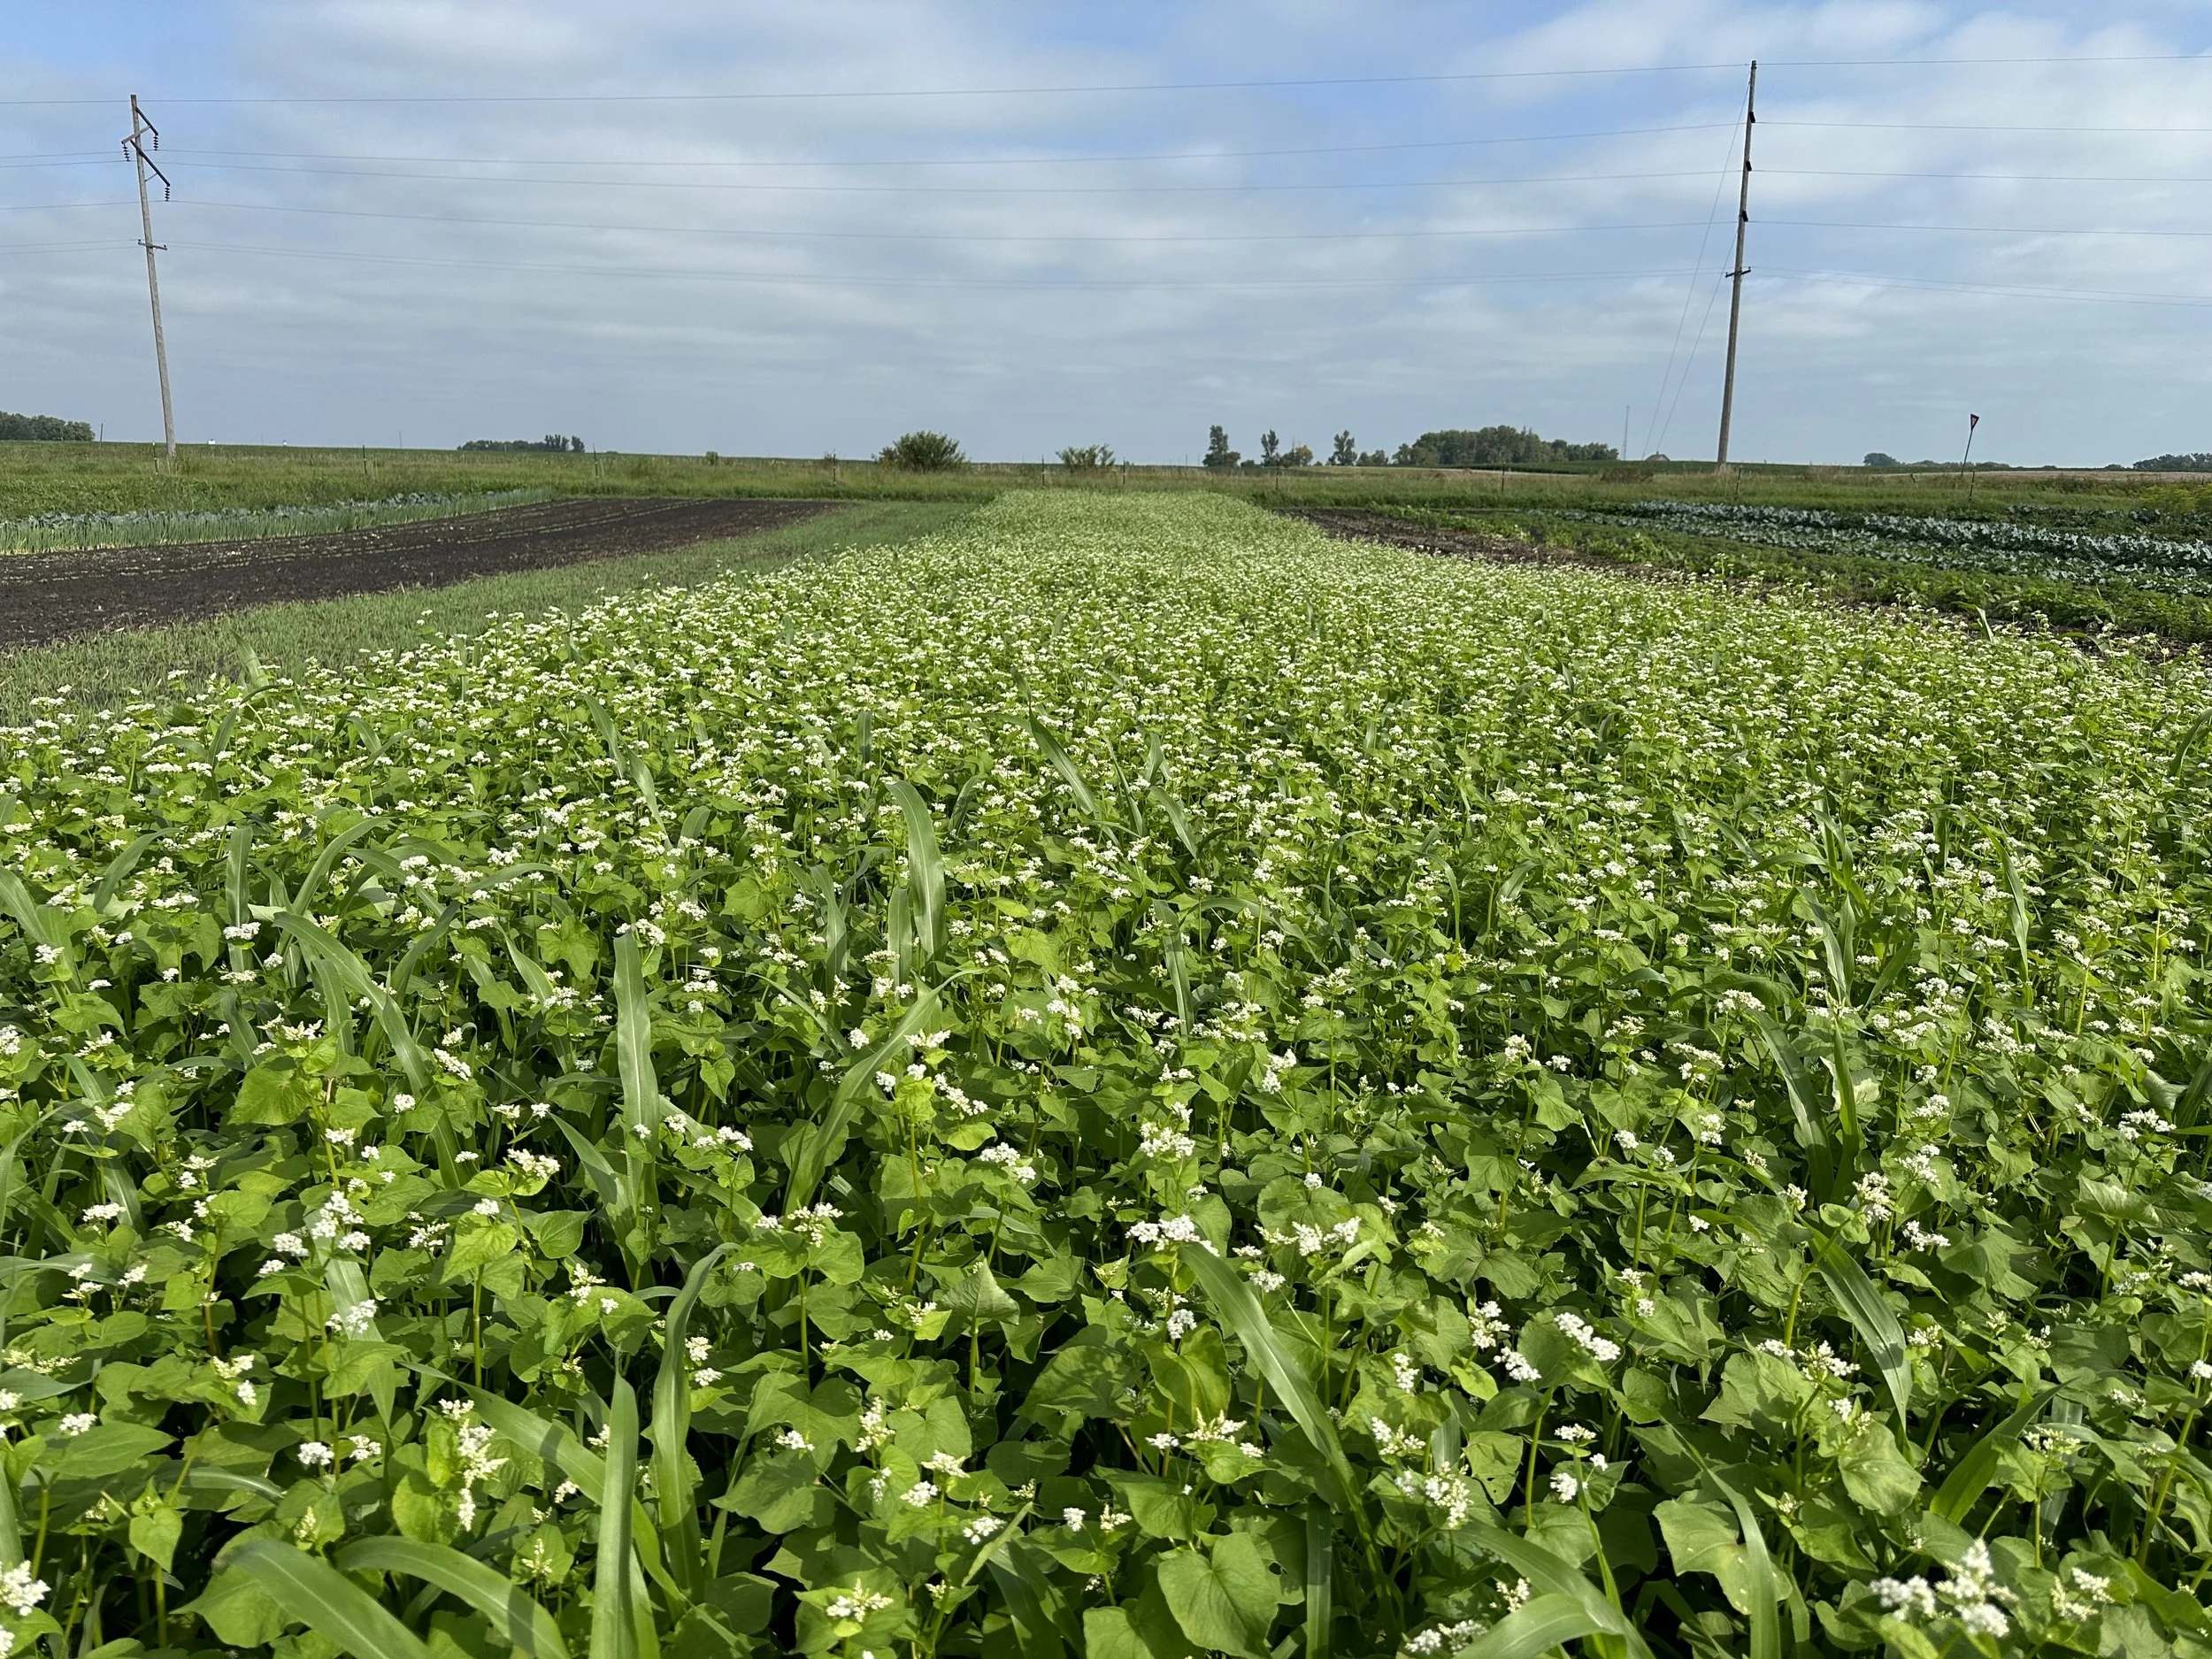
Our summer cover crop mix. The plants with white flowers are buckwheat. The long slender leaves that resemble corn are millet.
Cover crops serve a variety of purposes on our farms and many farms in general. Their benefits include reducing soil erosion, suppressing weed growth, providing habitat for beneficial insects, and improving soil health. Our primary goals for our cover crop mixes are to suppress weed growth and improve soil health. That’s not to say the other benefits are not important - they are. It’s just that when we look at which cover crops to plant we are seeking to achieve those goals primarily and the other benefits secondarily.
We have two mixes of cover crops that we use on our farm to achieve the goals of improving soil health and suppressing weeds. In summer we plant a summer mix of cover crops. That is, crops that grow well in the heat of the summer. This mix includes species like buckwheat, soy beans, sun hemp, sun flowers, millet & more. In the fall we plant a mix of peas, oats & phacelia. These crops grow better in the cooler temperatures of fall and can grow later into the season than our summer mix. Our winter mix is capable of withstanding frosts.
To suppress weeds we seed our cover crops pretty densely and lightly incorporate the cover crop seeds into the soil. With a little rain the cover crop comes to life creating a thick mat of vegetation that crowds out weeds. In our experience, we’ve observed that the areas where we plant cover crops are generally much easier to weed the following season.
Cover crops improve soil health in a few primary ways. First, some cover crops like peas can pull nitrogen (a primary plant nutrient) out of the air and store it in the soil for future crops to use. Cover crops in general also contribute to soil organic matter which microorganisms in the soil feed on. These micro organisms then metabolize the cover crops and leave behind nutrients future crops can use.
Many of our cover crops also achieve our secondary goals of reducing soil erosion and providing beneficial insect habitat. Because we’re planting pretty densely and minimizing fallow ground by using cover crops we are reducing soil erosion. Additionally, buckwheat - one of our primary summer cover crops - flowers quickly and the bees love it. Buckwheat provides habitat and forage for the bees!
Cover crops are an important part of sustainability on our farm. We’re always looking for new species and new mixes of cover crops to help improve our soil and improve our farm!

Addie (about 2yrs old) and I sitting in our oats & peas cover crop mix!
Bugs: Friends or Foes?
When we see a new bug on the farm the first question I ask is “Is this bug a friend or a foe?” As I was pruning tomatoes yesterday I saw these little red bugs/eggs pictured below. A bug I haven’t seen before. To determine if this was the beginning of a problem or something else I used Google’s image search and found that these are predatory stink bug nymphs.
Typically, stink bugs are a pest but in this case this type of stink bug is beneficial. They will eat other bugs.
Can we take a moment to just consider how crazy it is that I can snap a photo as detailed as below, upload it to Google and have an answer back in seconds? My phone camera picked up details my eyes could barely make out like the spines around the tops of the brown eggs. The nymphs are about 1mm in diameter - so tiny! Crazy and amazing. I’m not the biggest fan of big tech but this was one very useful image search!
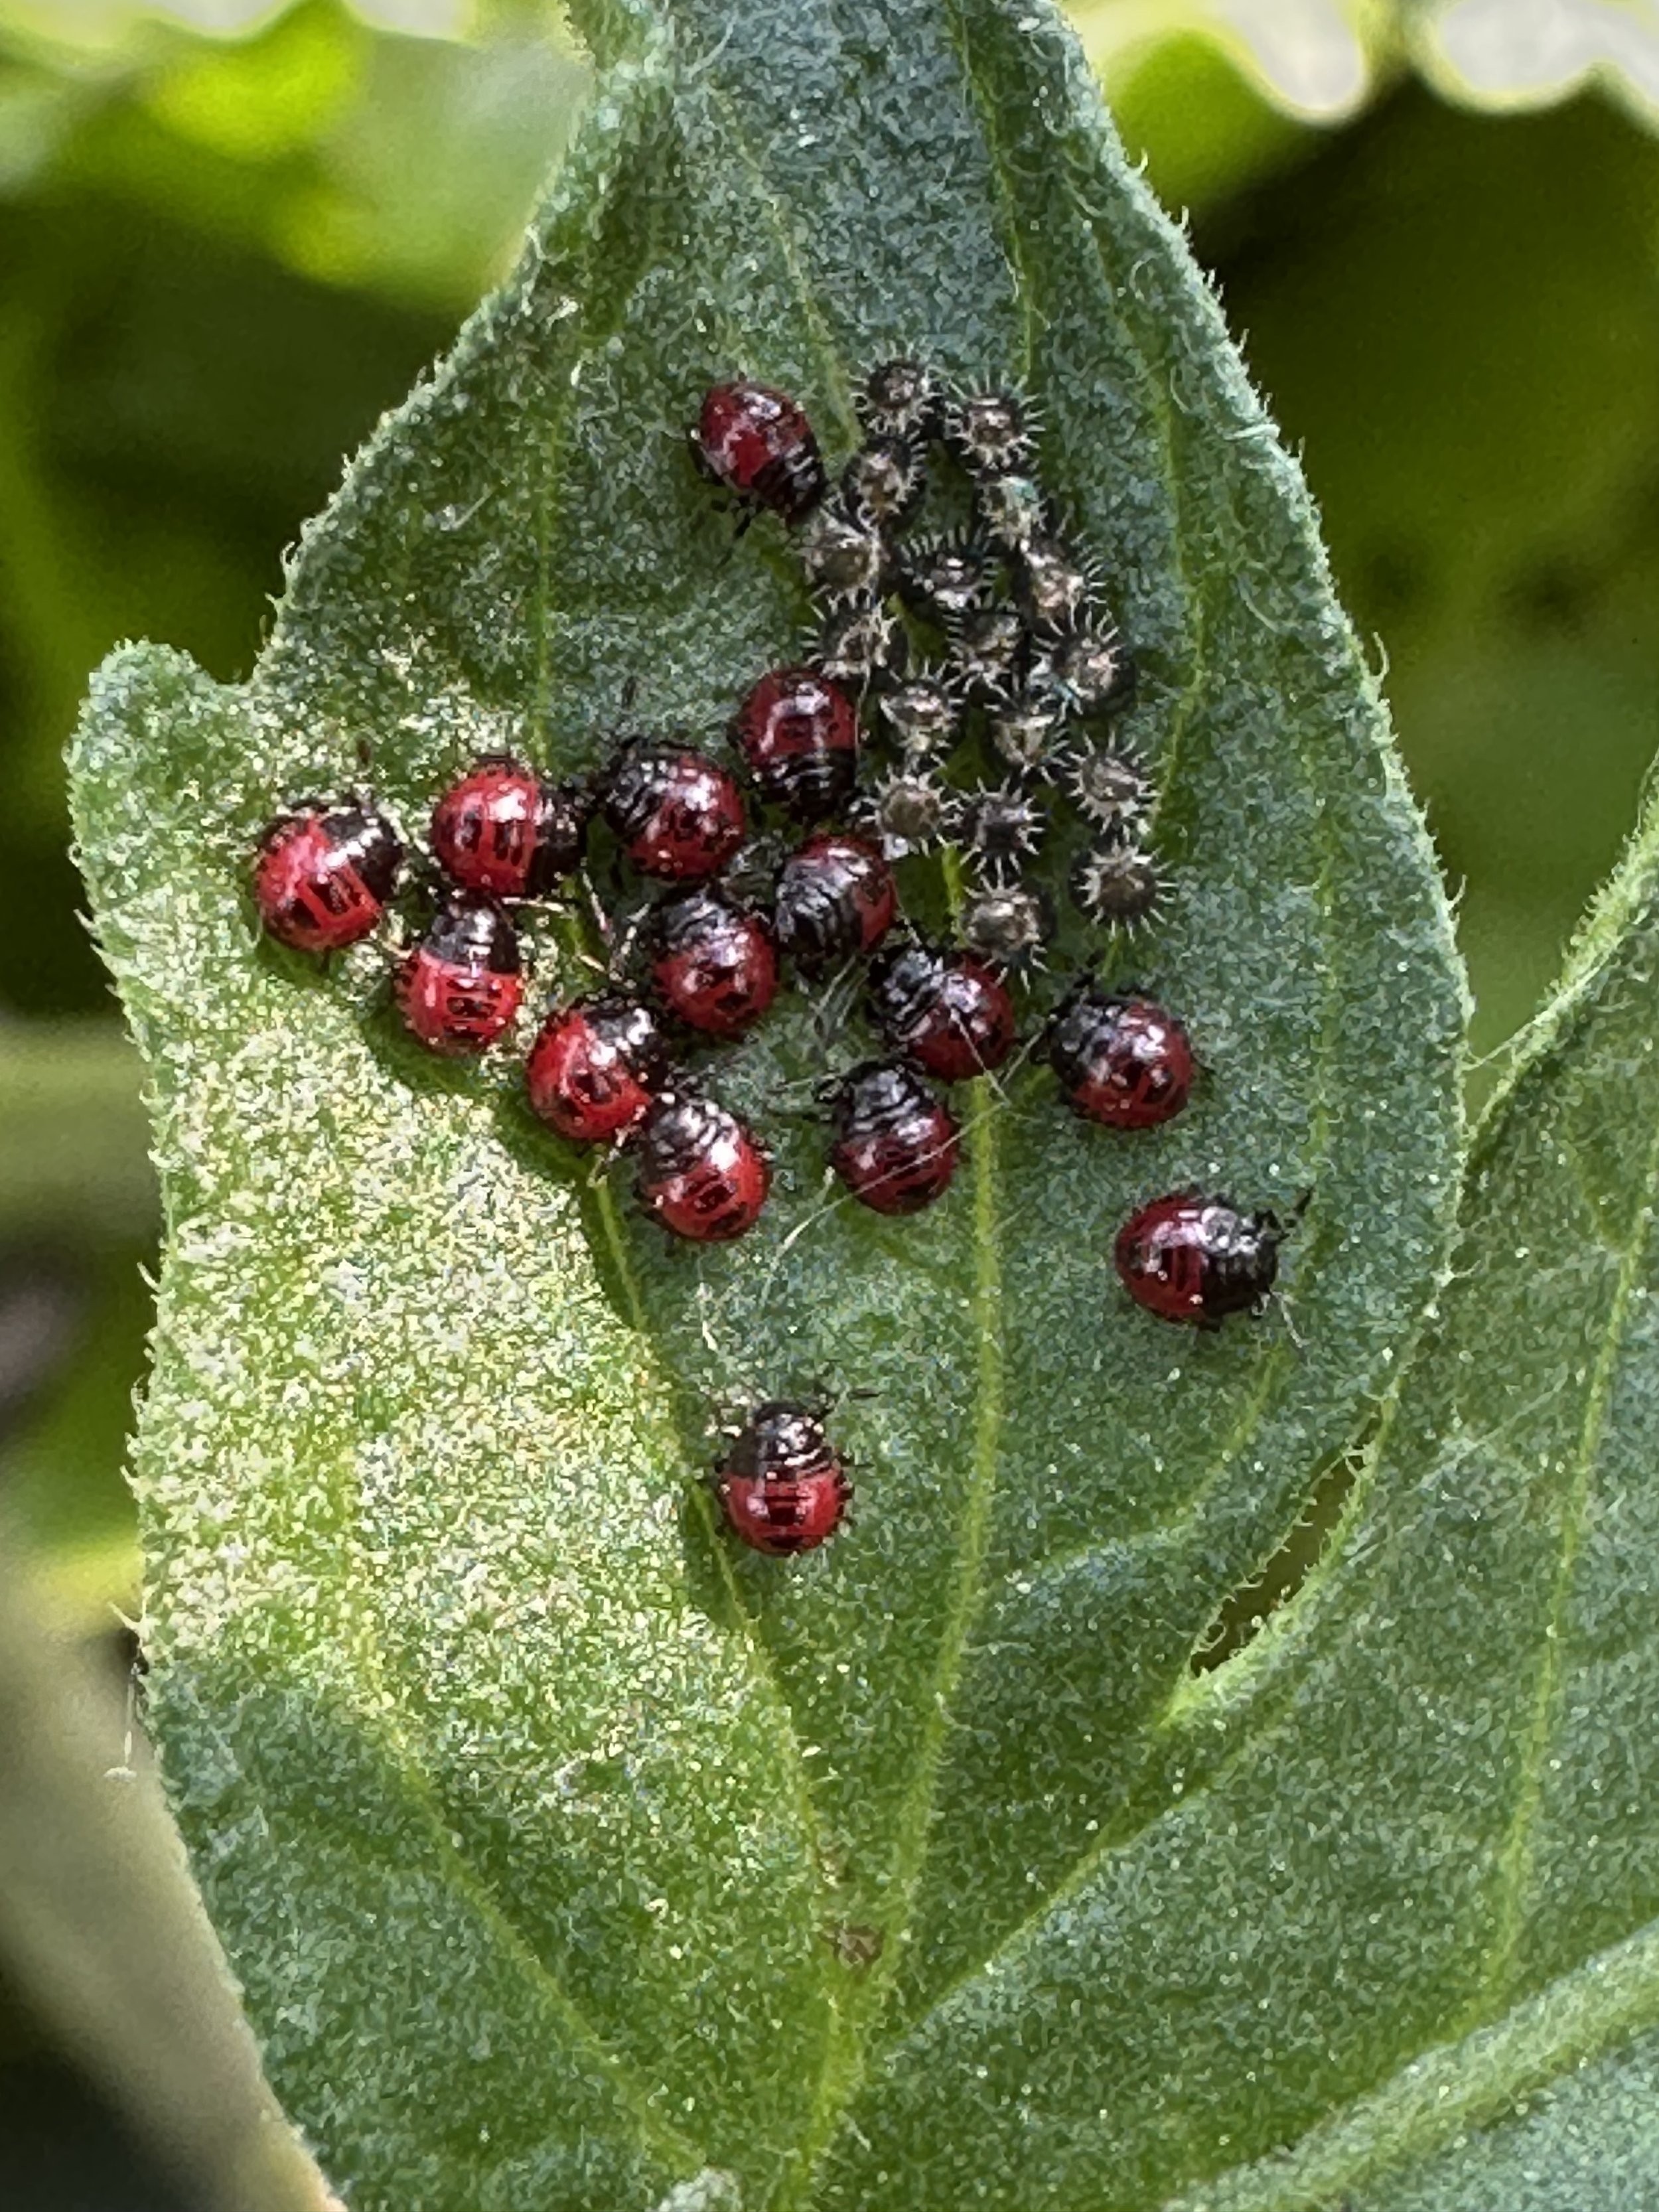
Predatory stink bug nymphs/eggs on a tomato leaf.
Weed Control 101 2026 Version
Weed control is something every farmer has to deal with. On our farm, we don’t spray chemicals on our crops or use pre emergent herbicides to control weeds which means we have to work really hard to control weeds on the farm. It doesn’t take long for weeds to get out of control and choke out the crops you’re trying to grow. Here’s how we do it.
Flameweeding
We use our flame weeder to burn small weeds just as they’re emerging from the soil and before our crops emerge. Because many weeds will germinate and sprout before our crops come out of the soil we can give our crops a head start by burning the weeds off. It’s been an effective tool for us especially in carrots and cilantro which have relatively long germination periods.

Our flame weeder.
Finger Weeding
No, not your fingers (although we do hand weed too). Finger weeders are discs with polyurethane “fingers” that spin and flick weeds out of the soil when they are young and vulnerable. This tools works particularly well on transplanted crops where the crop is vastly bigger than the weeds. This tool is highly adjustable and customizable for the varying crop stages we use it in. While the adjustments do take time, it’s very satisfying when it works perfectly!

Finger weeders in yellow. Notice how the fingers penetrate into the soil in the row.
Tine Weeding
Tine weeding is a type of blind cultivation - that is, cultivation that is “blind” to the crop rows - that uses many small wires that vibrate in the soil and help to uproot very small weeds.
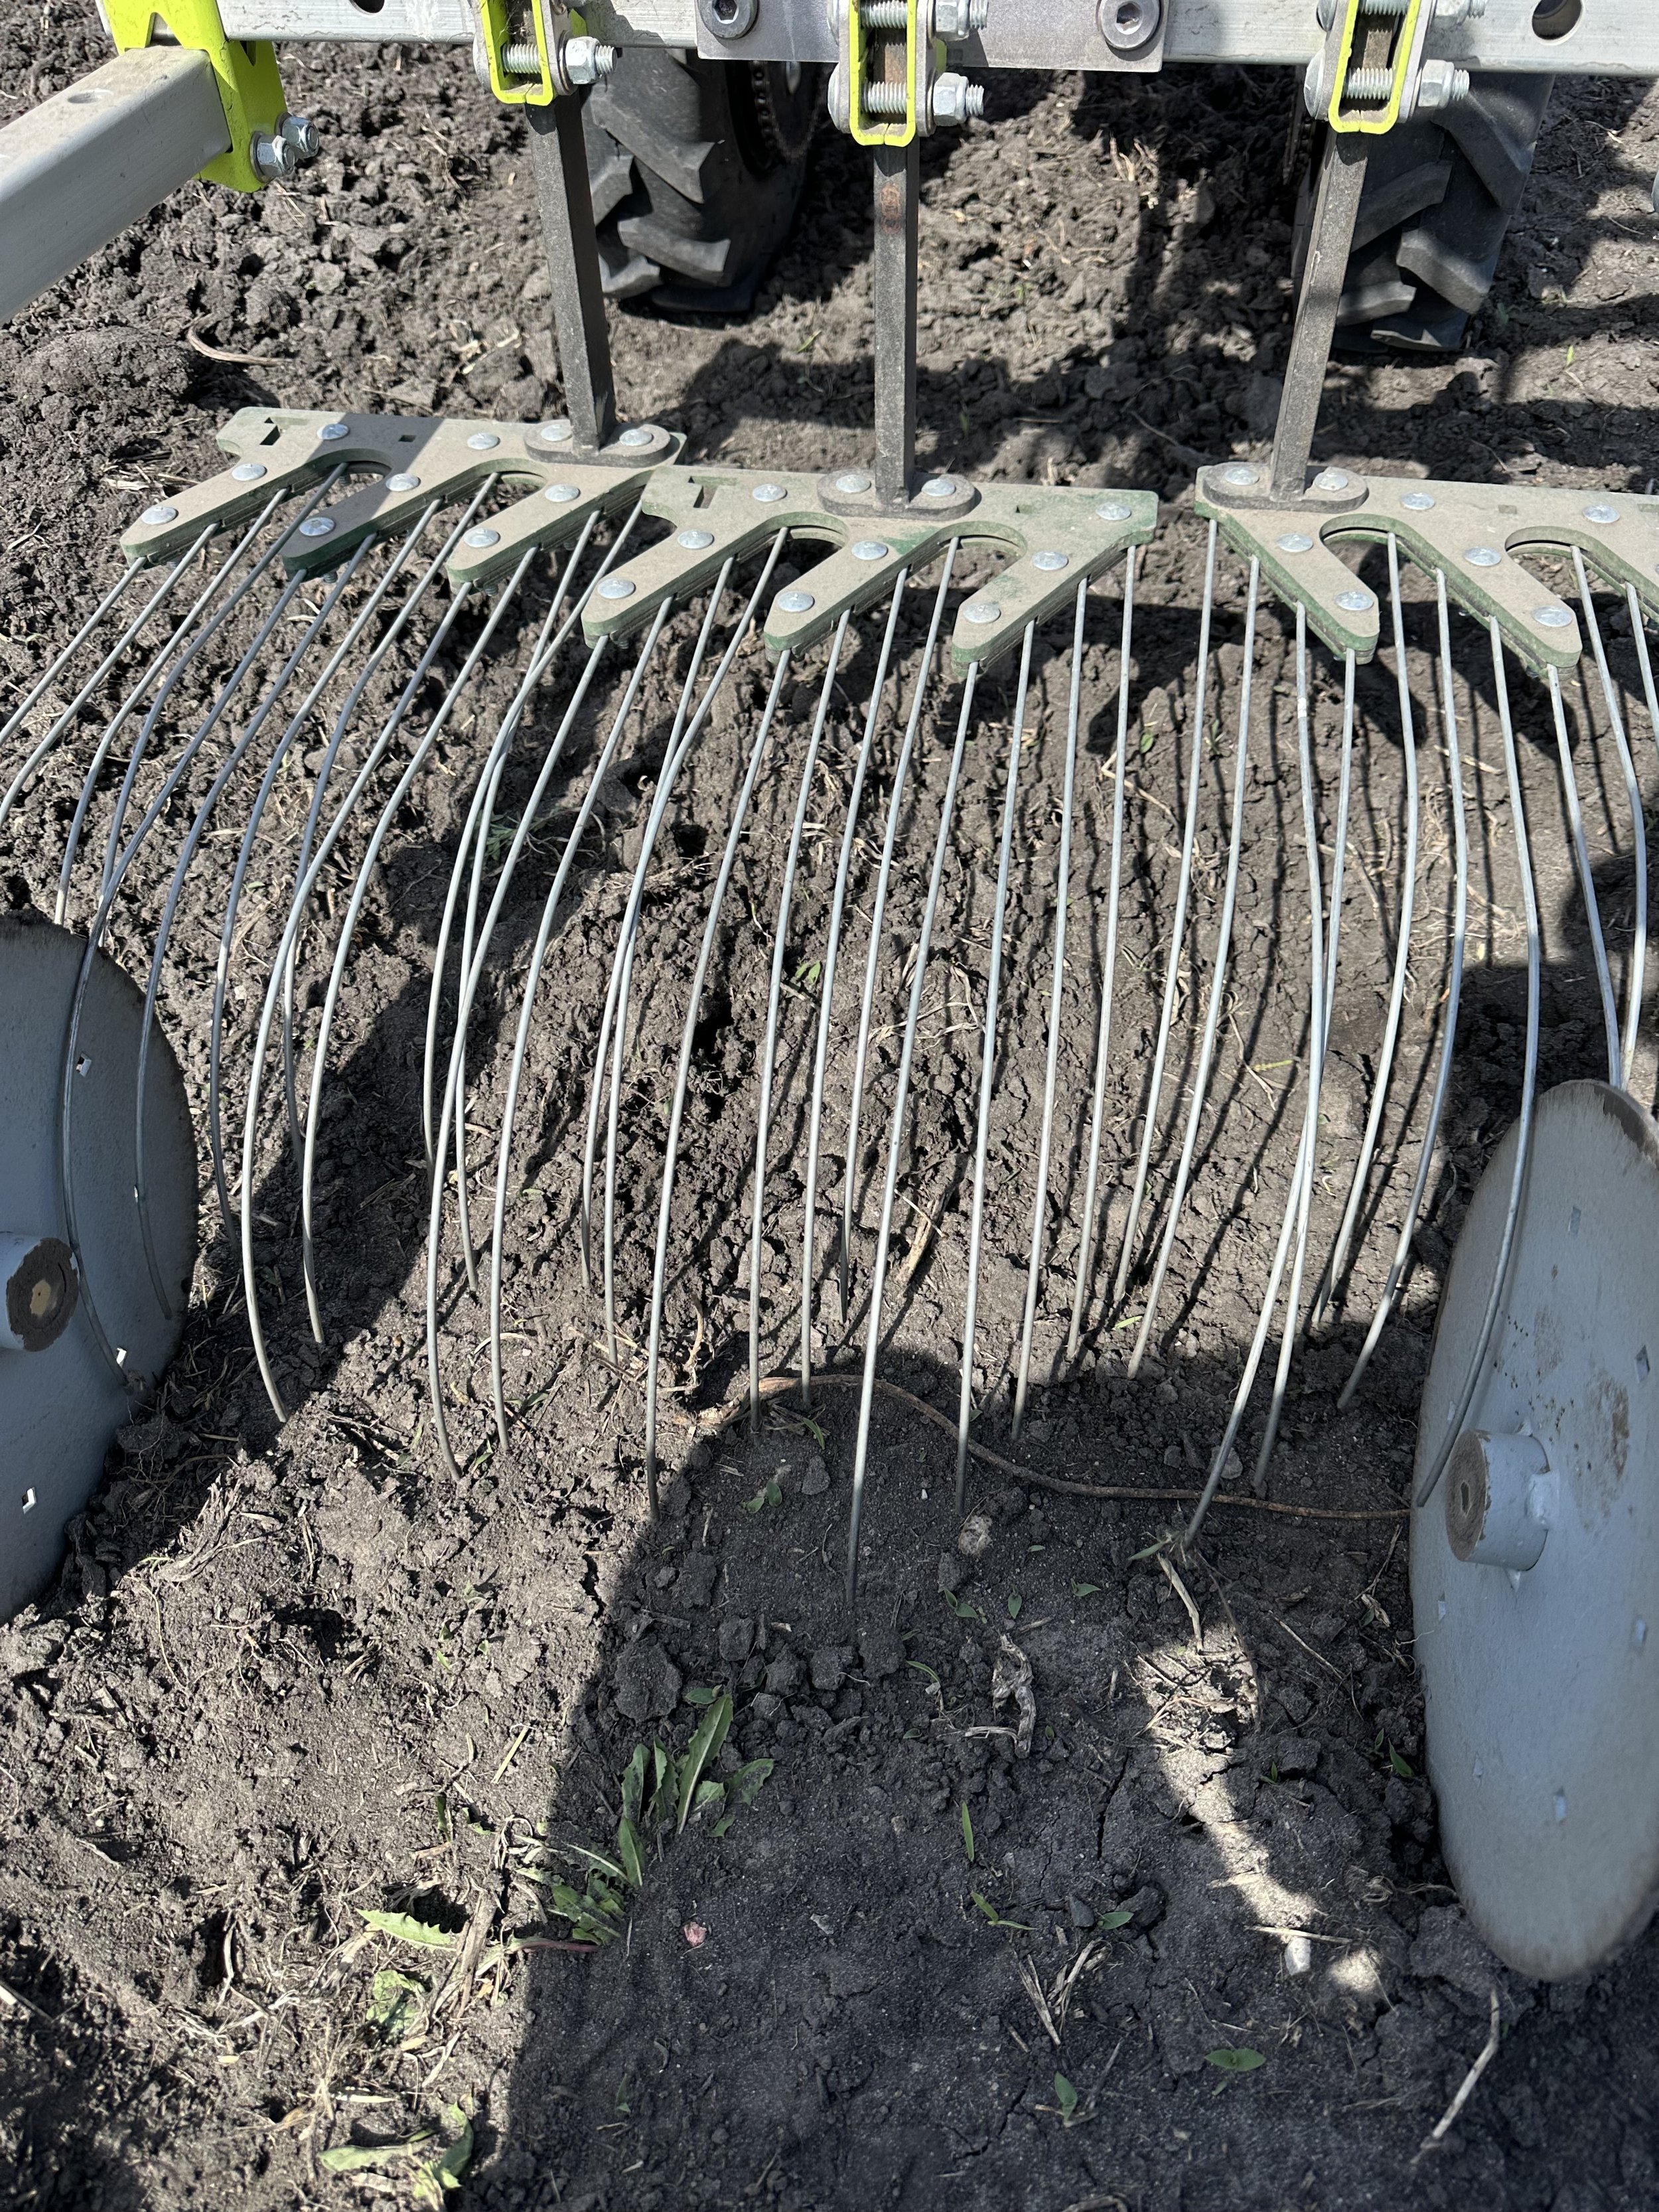
Closeup of the tine weeder.
Hand Weeding
Hand weeding is the most expensive and slowest weeding on the farm. All of the tools above help us reduce the hand weeding we have to do. We won’t completely eliminate hand weeding but in many cases we can reduce the time we spend hand weeding by 70% to 90% by using the tools above at the right time.
Finally, we take all of these tools together and apply a couple principles to them and we arrive at our weed control methodology.
Cultivate after every rain/irrigation session.
If you can see the weeds, it’s already too late to be most effective.
Stack cultivation tools as much as possible. Stacking tools means you use more than one method on each crop as often as possible.
Never let a weed go to seed.
Plant cover crops in fallow ground.
Winter Tunnel Complete!
How we’re preparing it for it’s first crop.
The crew at Quality Structures who built our new winter tunnel wrapped up construction about a week ago. All that remains is a bit of dirt work around the outside perimeter of the tunnel. That means it’s time to get this tunnel ready for it’s first crop: paradoxical summer lettuce. I’ll explain why summer lettuce and what we are doing to prepare this tunnel for production.
When we designed the winter tunnel we knew we wanted a space that we could use for both winter and summer production. We’ve seen other deep winter greenhouse designs and they are basically unusable in the summer because they get too hot. We are pretty confident our winter lettuce will be successful and cost-effective but we’re not 100% sure about that. We thought that if we’re going to invest this much money then we need to be able to utilize it like our other tunnels. So, because this tunnel is also capable of producing summer crops and due to some space limitations in our other tunnels the first crop in this tunnel will be summer lettuce. In future seasons we will rotate this tunnel between summer peppers/cukes/tomatoes and winter crops.
To prepare the growing space we planted a cover crop mix of annual rye grass and clover. These cover crops will grow for about a month before we terminate them and prepare beds for summer lettuce. The annual rye grass and clover will help loosen the soil and add some nutrients back into the soil. Both will also suppress weeds and add organic matter to the soil.
We can’t wait to start growing in this new winter tunnel!
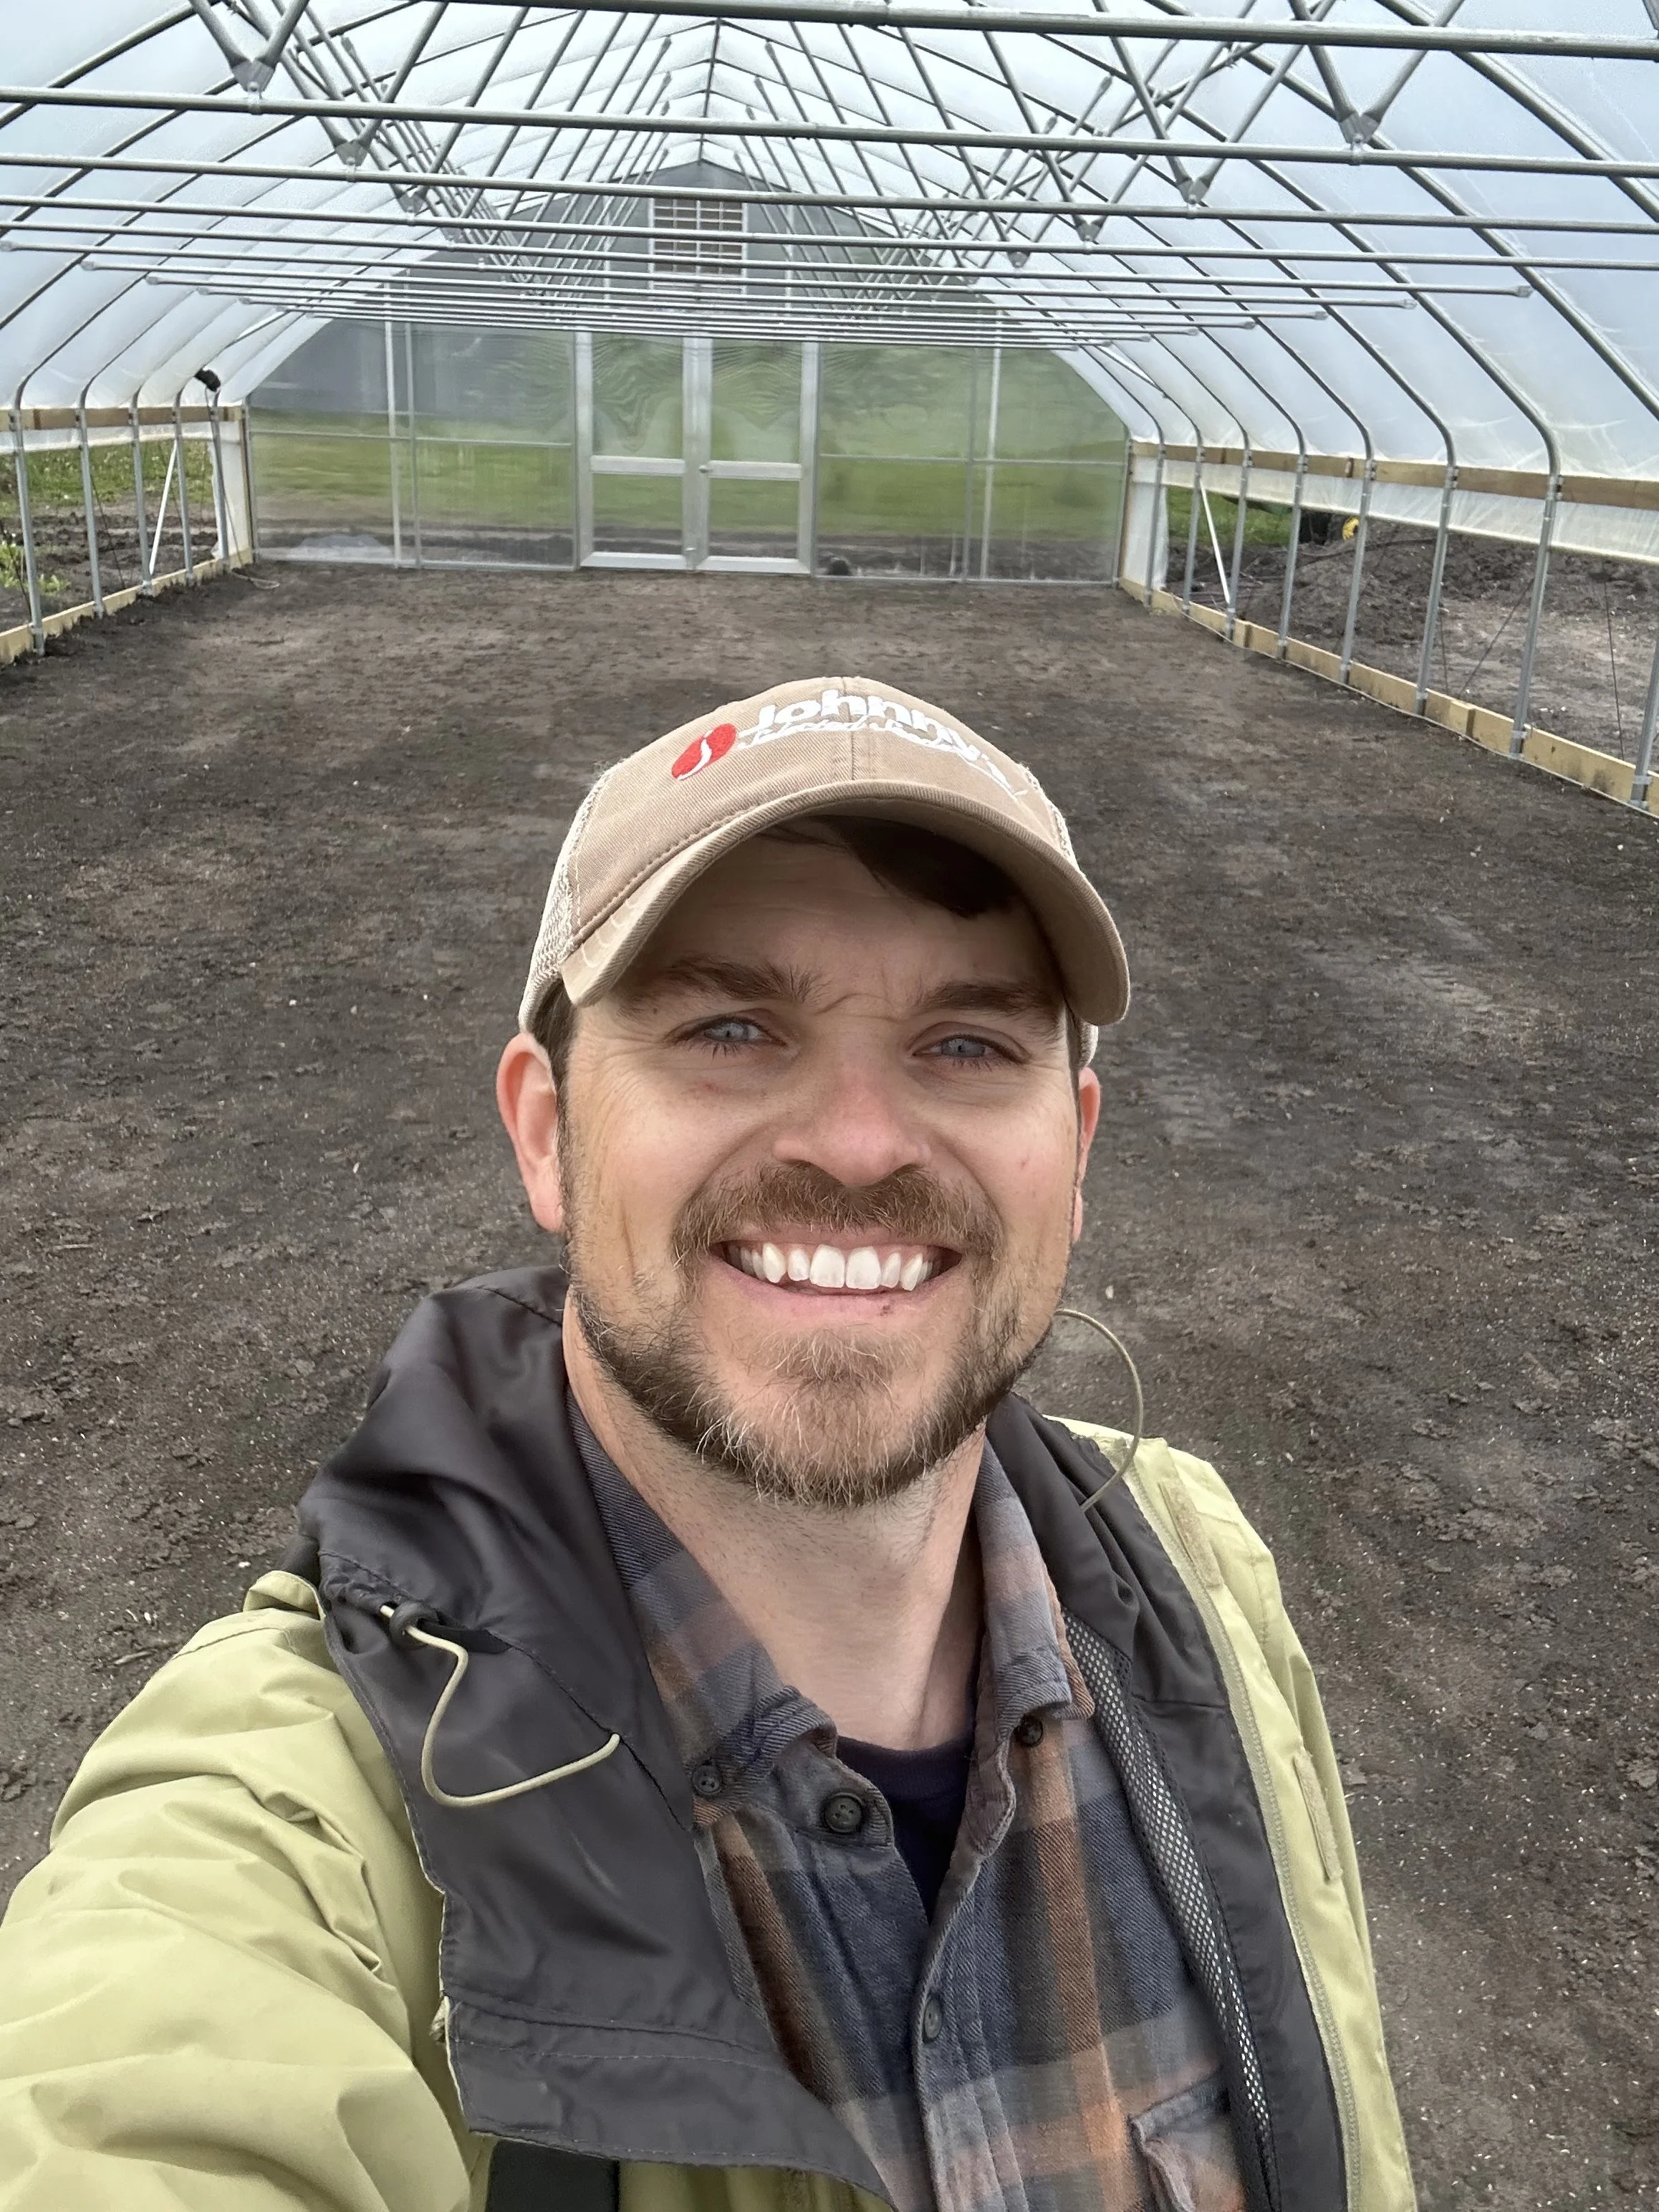
In the new winter tunnel!
Landscape Fabric: The Good, The Bad, The Ugly
I have a bit of a love-hate relationship with landscape fabric. I love that it dramatically reduces weed pressure AND keeps our crops clean. I hate that it’s plastic and managing it can be difficult to say the least. Last week, we laid down landscape fabric in our field pepper & tomato beds so it’s the perfect time to talk about how we manage it, why we use it, and some tricks we use to make it easier to deal with.
Landscape fabric is made from woven plastic strands that allow air and water to pass through but block weeds from growing (for the most part). We use it for two main types of crops lettuce & long season crops like tomatoes, peppers, eggplant & kale. While lettuce is a very short season crop, it’s still really nice to suppress weeds so they don’t end up in your salad and keeping our lettuce clean is another big plus. On our longer season crops the main benefits are weed suppression and reduced disease pressure. Many diseases that would affect our tomatoes are soil-borne so reducing soil splash up from rain events helps reduce disease pressure.
Landscape fabric can be re-used for around 5-7 seasons in our experience with careful management. We typically fold landscape fabric up neatly, tie it with twine so it stays neat, label it so we know what length, hole spacing and the date it was last used and store it in our storage shed until the next season. To keep landscape fabric fastened down to the soil we use hundreds of staples about 8” in length spaced every 2-3’ to keep the fabric in place.
When brand new, landscape fabric doesn’t have any holes. We created these custom plywood templates with different hole patterns and spacing. This allows us to quickly and accurately burn holes into the fabric at optimal spacing for the crops were growing.
The Good
Weed suppression, disease reduction, cleaner crops
The Bad
Labor to manage, lots of staples, you need a calm day to install it.
The Ugly
Plastic :-(
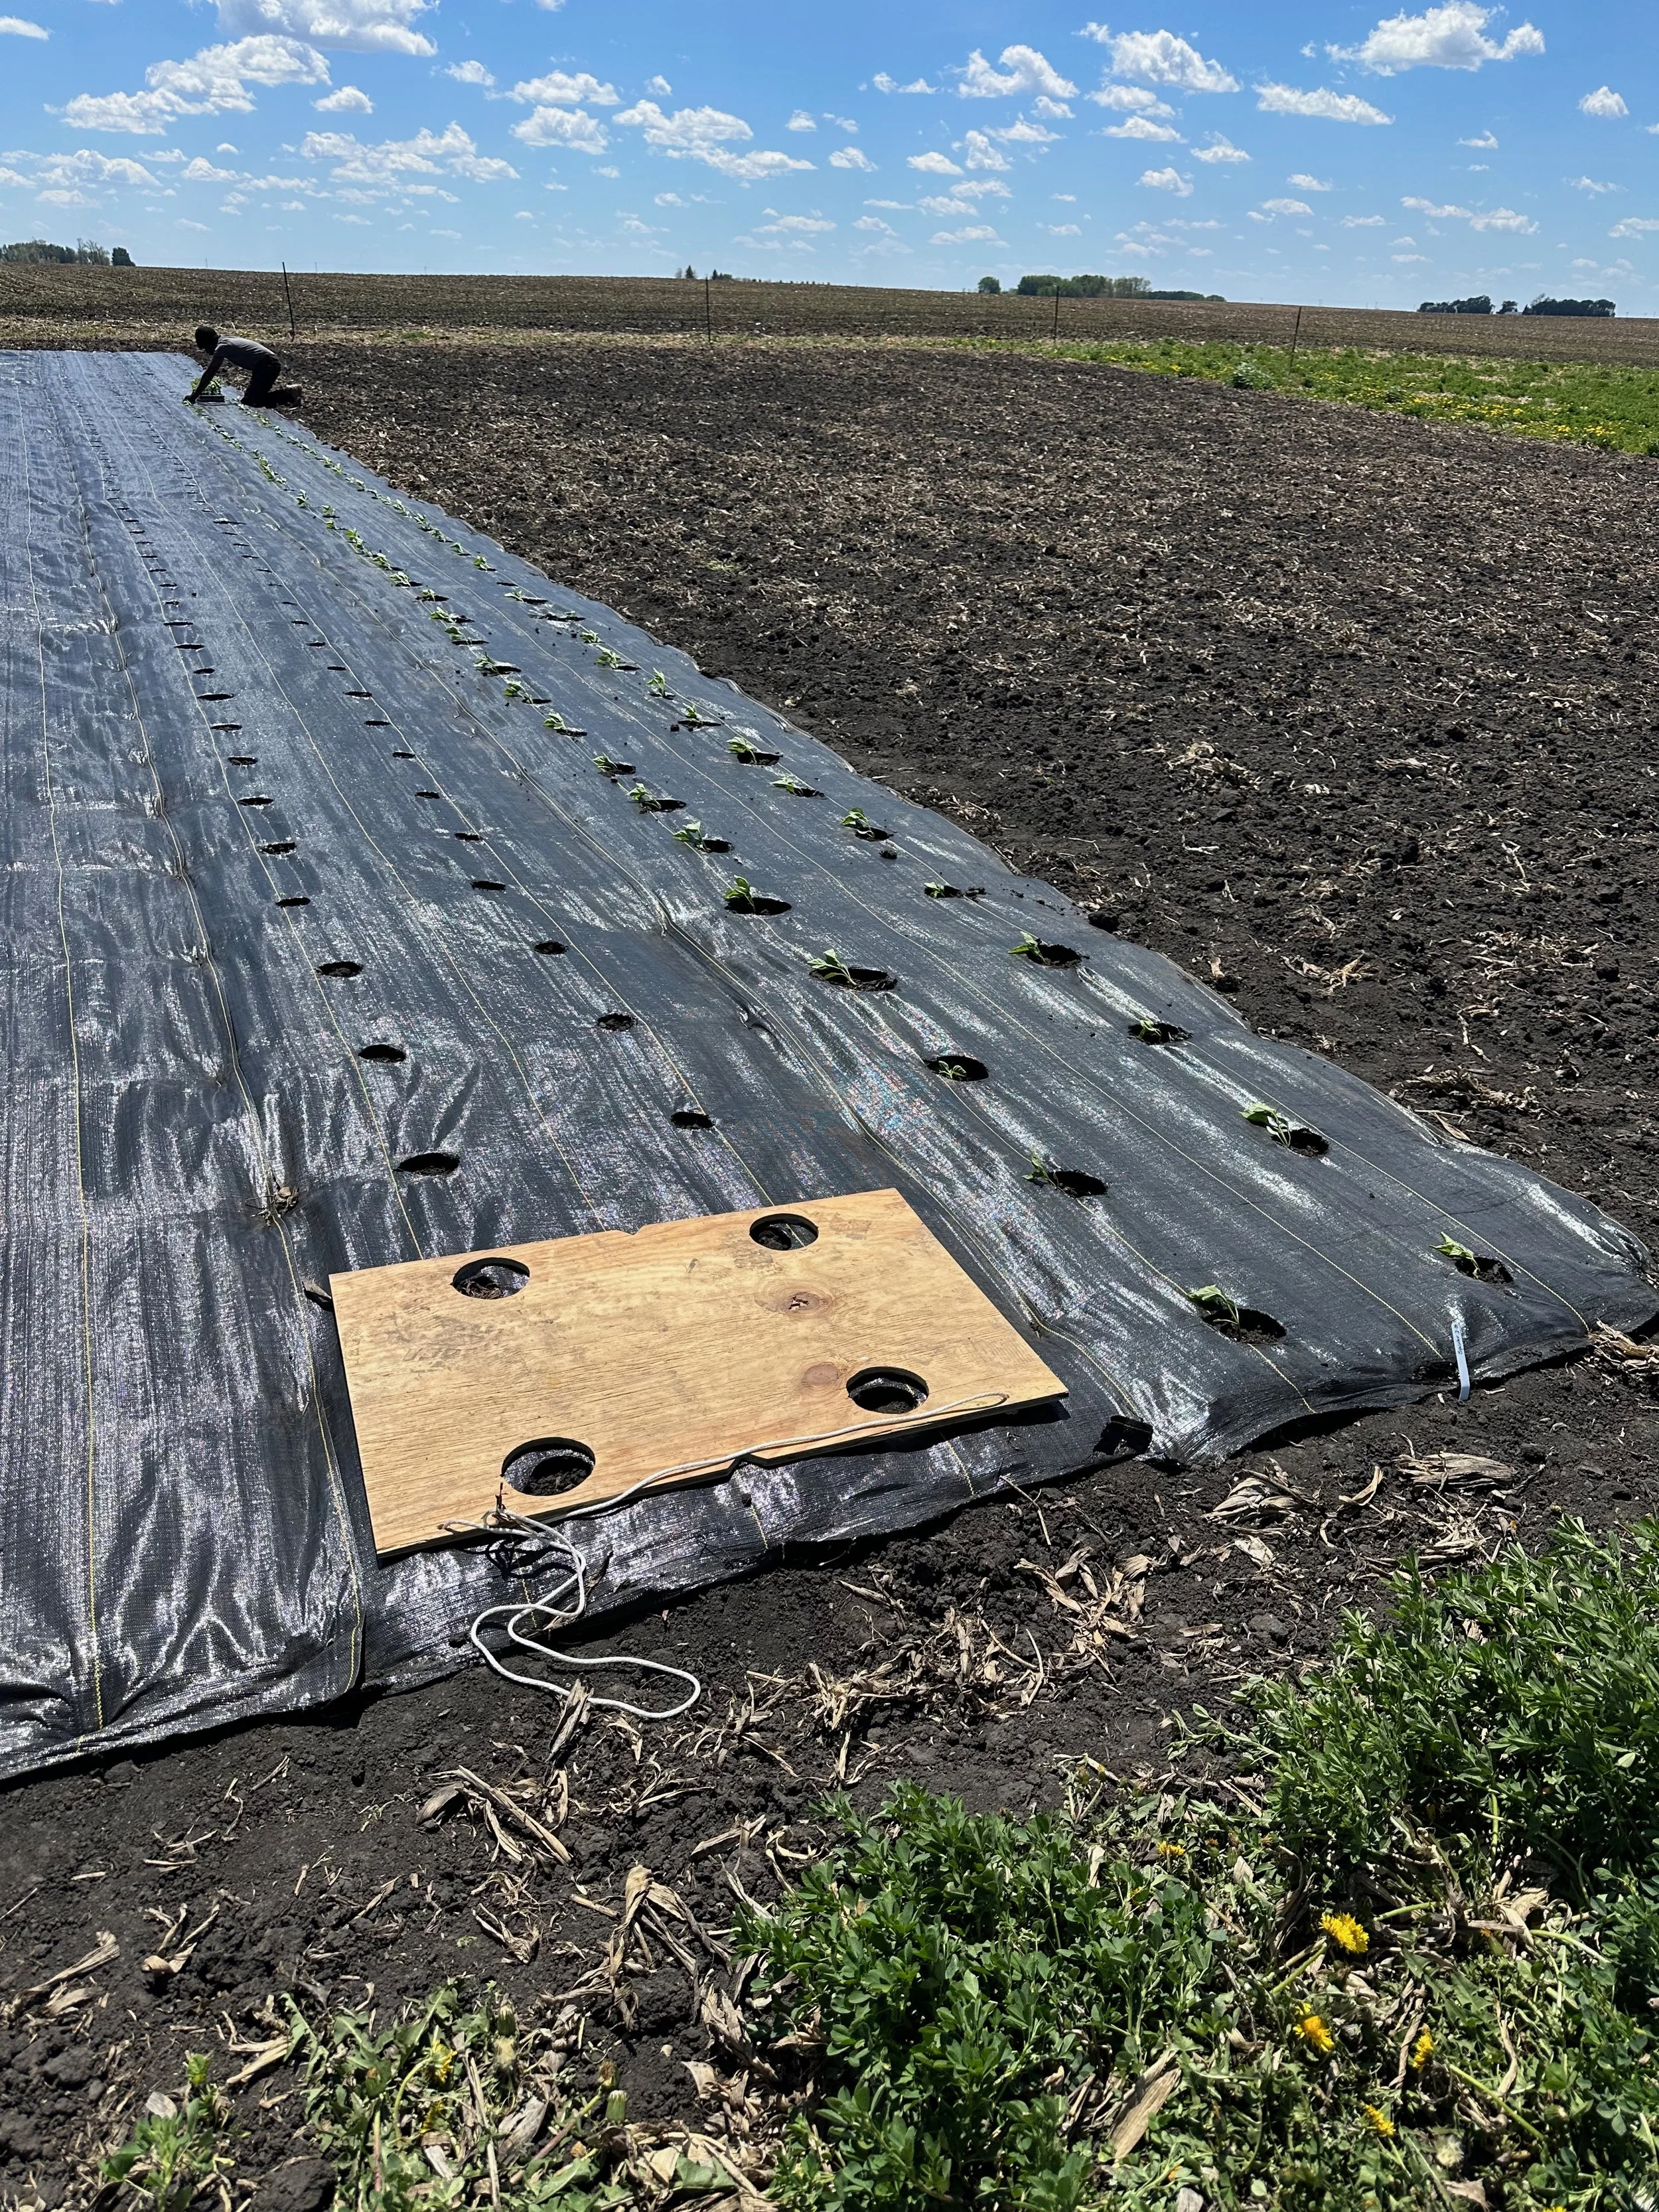
Burning holes for crops into landscape fabric with this template.
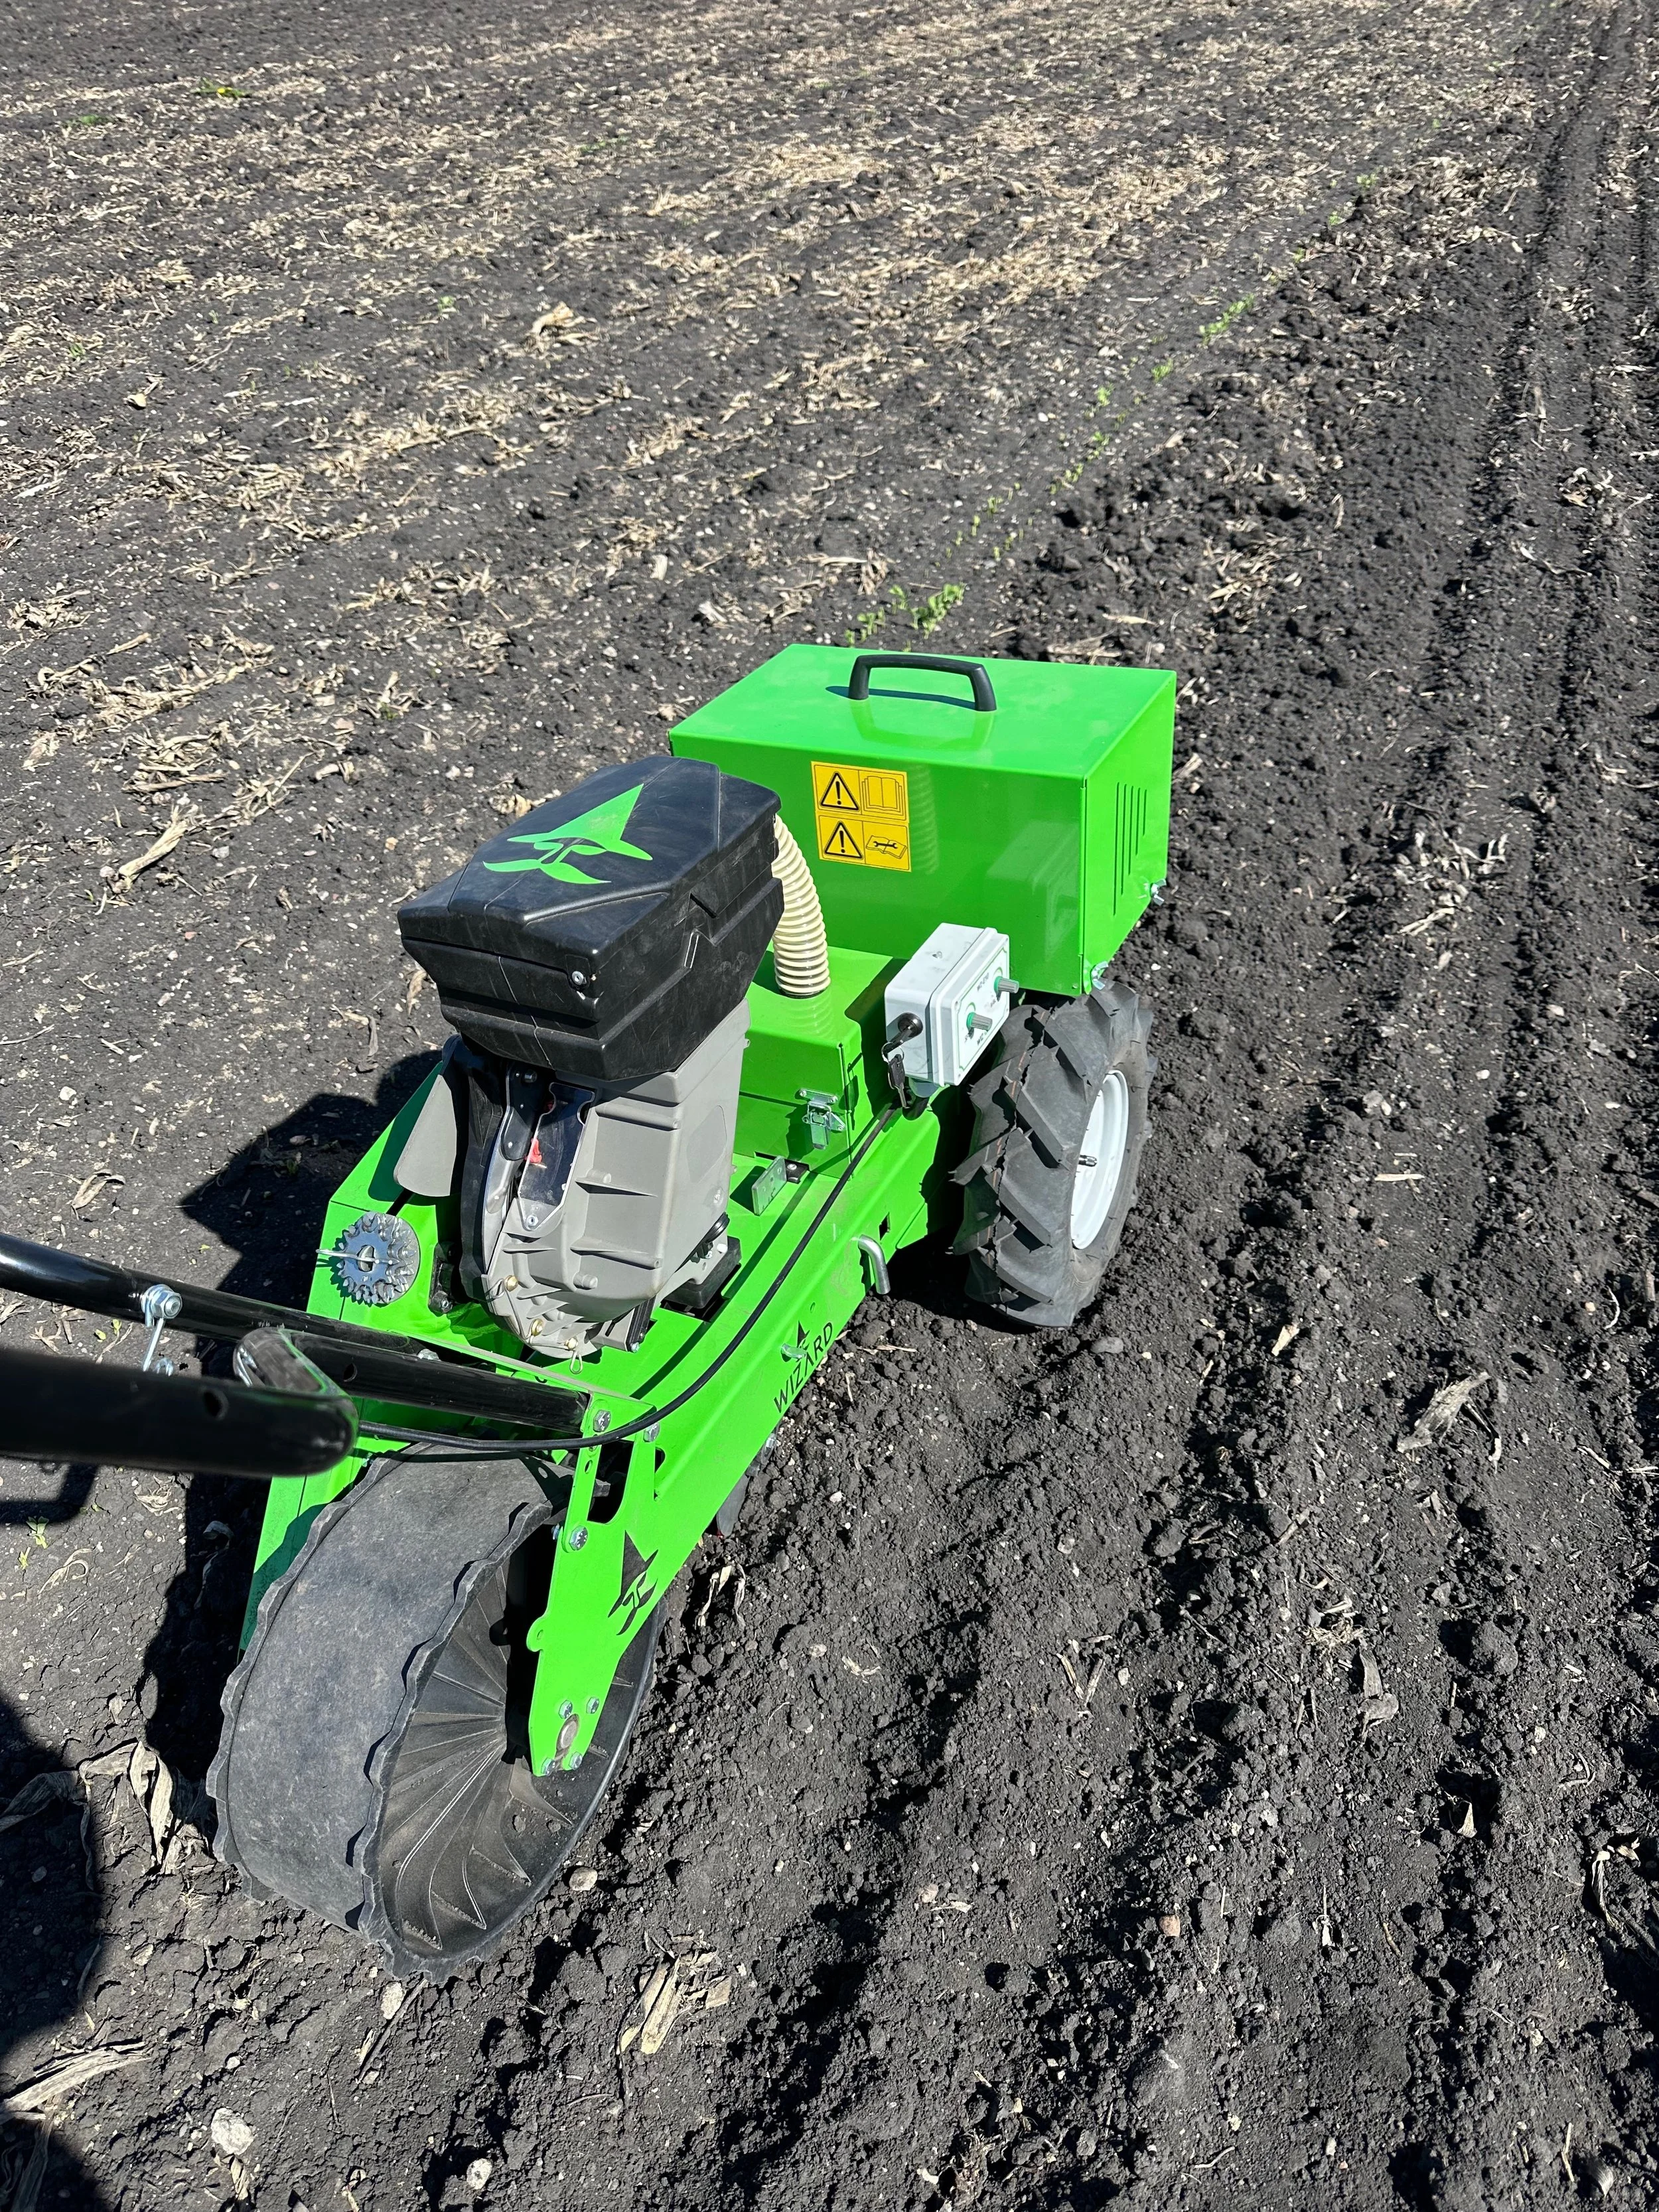
Vacuum Seeder Explained
Last year we made a big (and expensive) upgrade to our direct seeding equipment with the purchase of a Wizard Electric Vacuum Seeder. A vacuum seeder is going to help us solve some of the biggest problems we have with our direct seeded crops like sweet corn, peas, beans, beets & more. This weeks blog post will go over how the vacuum seeder works and the problems it helps us solve.
The name gives it away: vacuum seeder. The seeder uses vacuum to pull seeds up against a plate. The plate rotates at a configurable rate to allow for variable spacing for different crops. For example, peas like to be really close together at 1”-2” between plants whereas sweet corn and popcorn need more space at 9”-12” between plants. Once the seed held against the plate is at the precise location it needs to be the vacuum is cut and the seed drops down into the soil.
The biggest advantage of a vacuum seeder over our existing gravity based seeders is seed singulation. That is, making sure a single seed drops into the soil at the spacing it’s supposed to. This solves two problems at once for us: jams and double/triple seed drops. Our gravity based seeders often jam which means we’re no longer dropping seeds at the right spacing. The other double/triple problem is when multiple seeds are dropped at one time when there should just be one. That means we have to go back and thin the plants. More time, more work and worse yield.
We’re happy to have this new seeder and we’re excited to share the results with you later on this summer!
The Frost Dance
Hot, then cold. Hot, then cold. Repeat for April and the first 10 days of May. It’s been a roller coaster ride for weather so far this spring. Not so much of an issue in the first half of April but once we have our tomatoes and peppers planted in our tunnels we need to take extra precautions to make sure these cold-sensitive crops survive the chilly nights.
You might be surprised to know that in the early morning hours that the inside temperatures of the tunnels basically matches the outside temperature. That’s because the single layer of 4 mil plastic doesn’t have much of anything for R-value. Anytime it gets close to 32* F we worry.
If we know it’s going to be below 32* F we move our trays of not-yet-transplanted peppers, tomatoes, cucumbers, basil & eggplant from our greenhouse to our pack shed. That’s not an option for the tomatoes, peppers and basil already transplanted into our tunnels.
To ensure these cold-sensitive crops survive we use row covers, pictured below, to help trap the heat of the soil under the row cover. We typically see about 3-7* F temperature difference under the row cover which is enough to get us by these chilly nights.
We’re in our 12th season farming and I don’t remember a spring where we had so many frosty nights between April 20 and today. Sure, we expect a 2-3 frosty nights in that time frame but not the 10+ nights and counting.
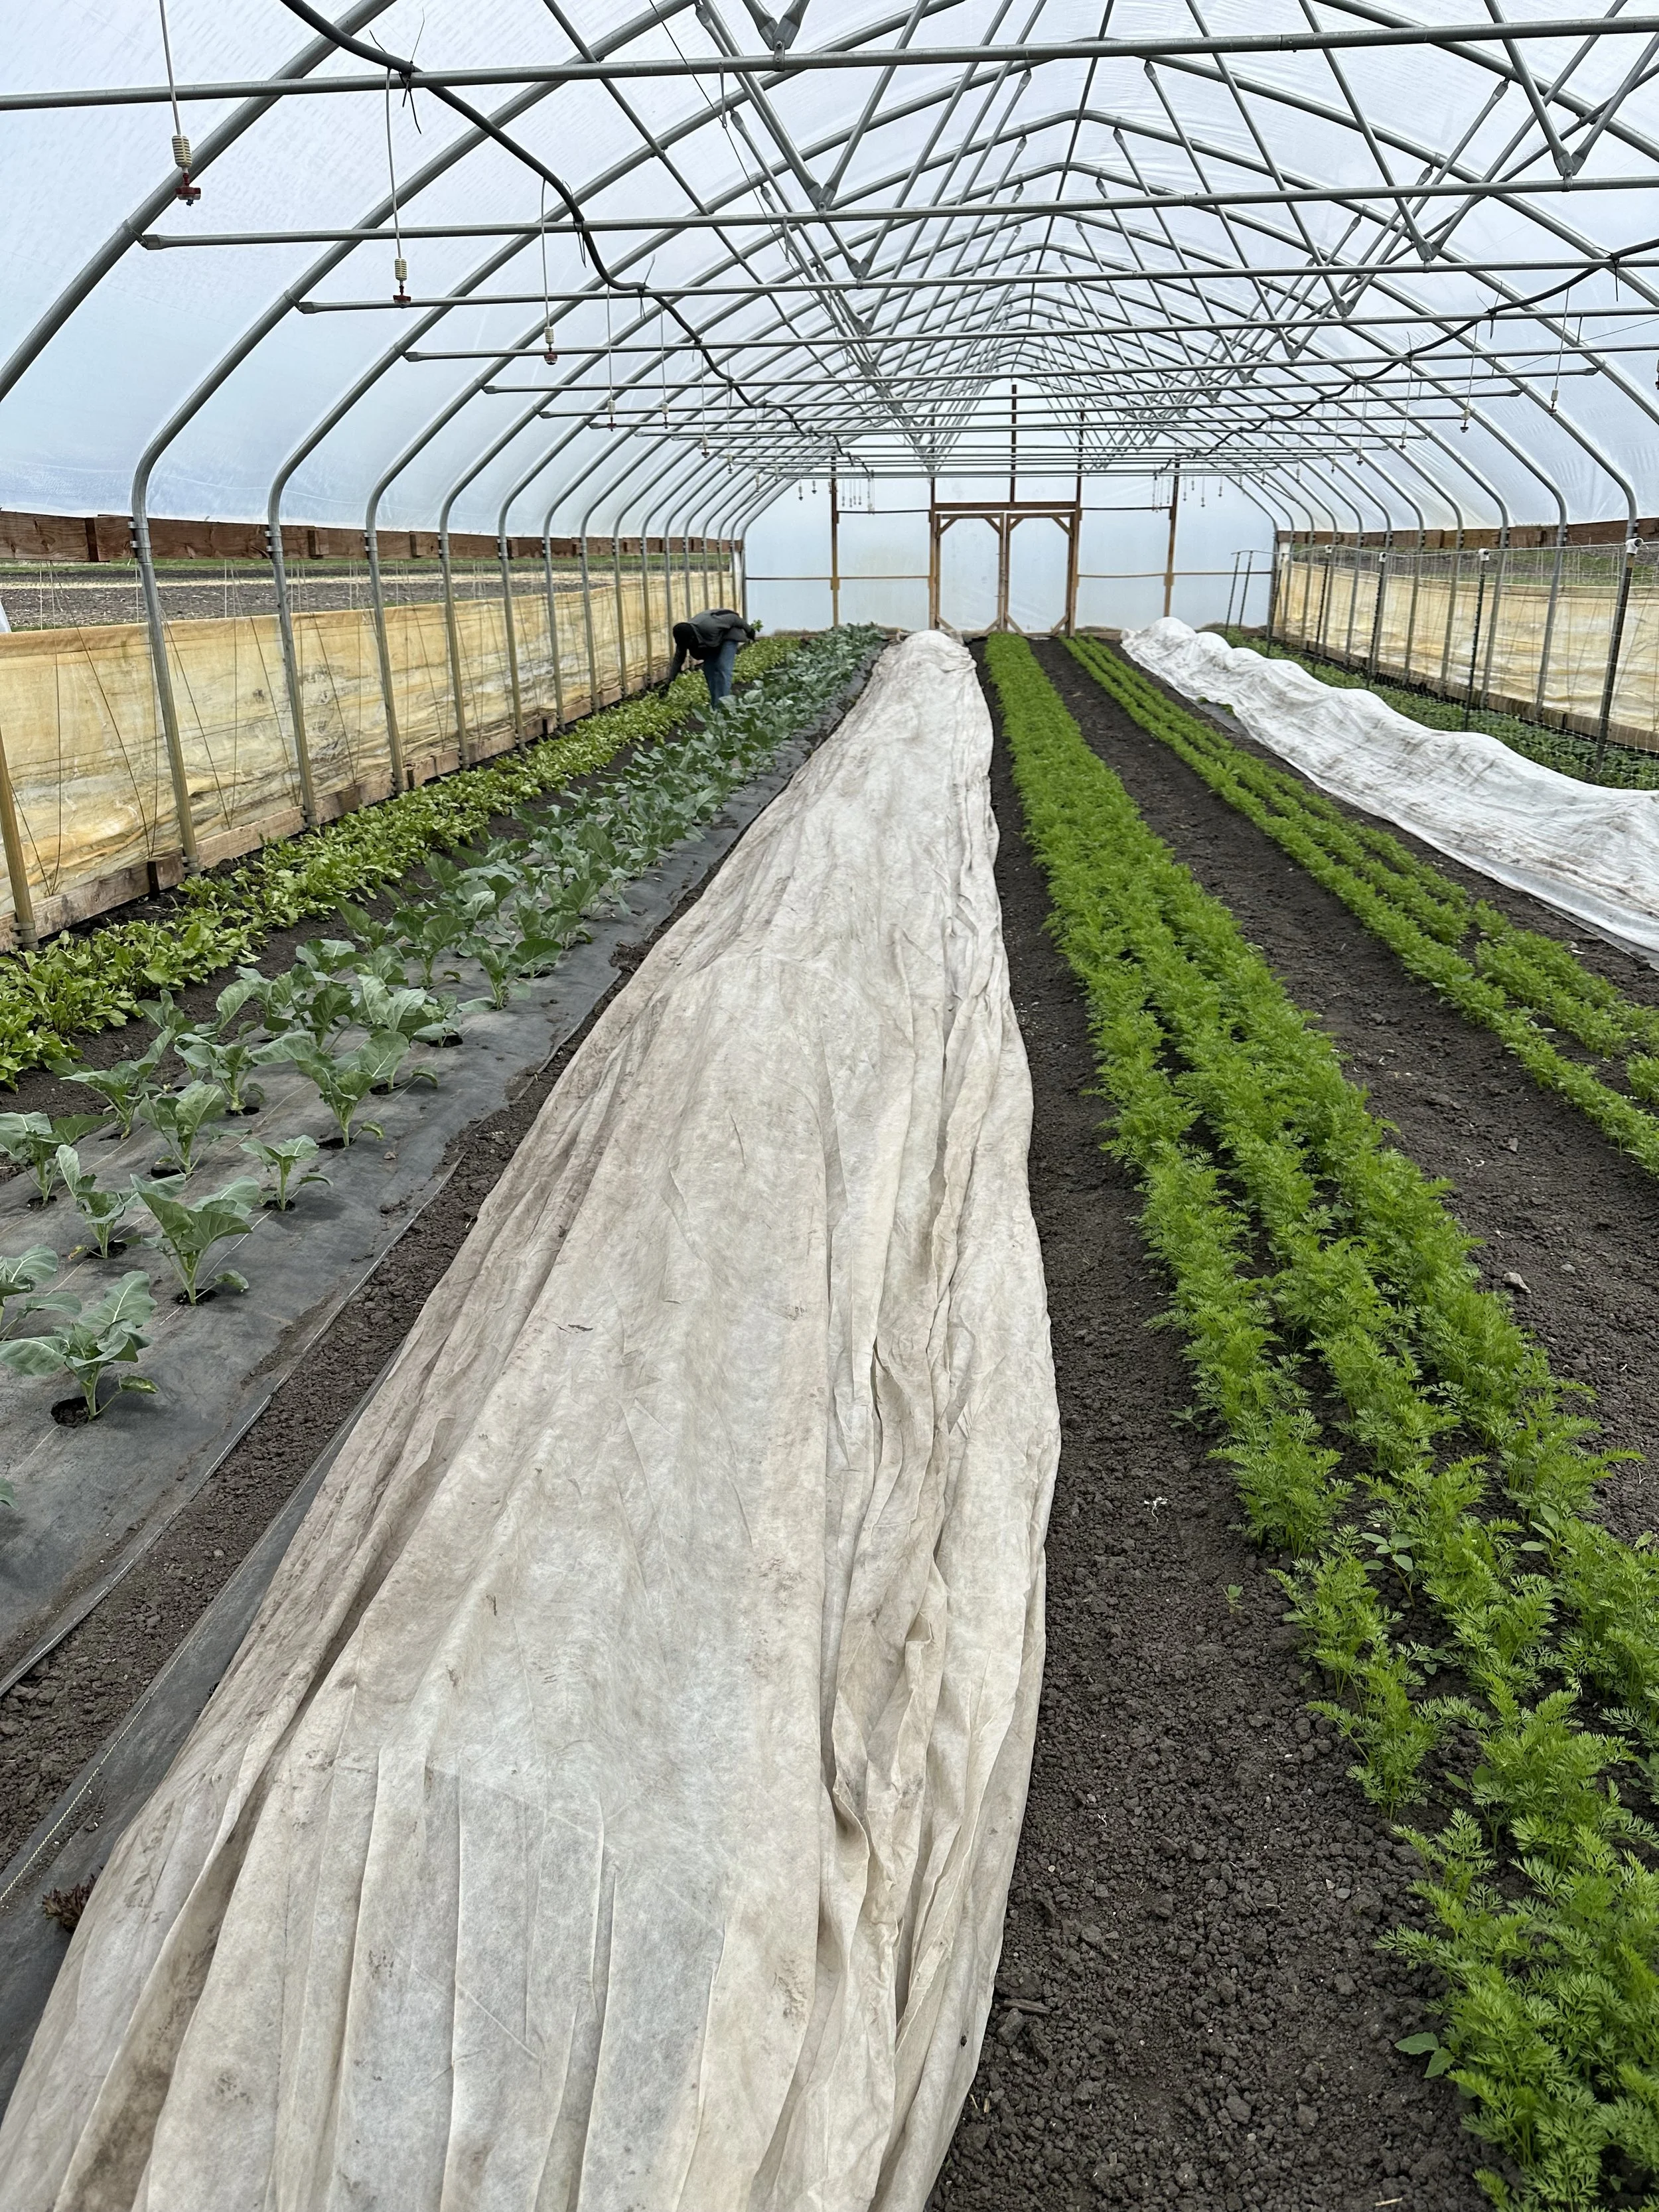
Tomatoes tucked under row cover for another frosty night.